
On this page
Introduction
This blog post is a new version of the blog post Build your own personal cloud. The difference between that and this blog post, is that in the previous blog post everything was installed manually and in virtual machines, while in this blog post everything is installed directly on the host and with containers. The advantage of this new setup, is that it's much easier to install and by running everything on the host it's also more efficient.
If you want to install Nextcloud on your own server, I recommend following this tutorial and not the older one. I keep the older one online, because it contains a lot of valuable information for installing Nextcloud manually.
This blog post only contains the step-by-step procedure to install Nextcloud on the server with Docker. If you want information about why I chose these (and other) software, I recommend reading the old blog post.
While this blog post is about installing Nextcloud on Red Hat Enterprise Linux, you can also use this tutorial for installing it on AlmaLinux, Rocky Linux or any other RHEL derivatives.
Software setup
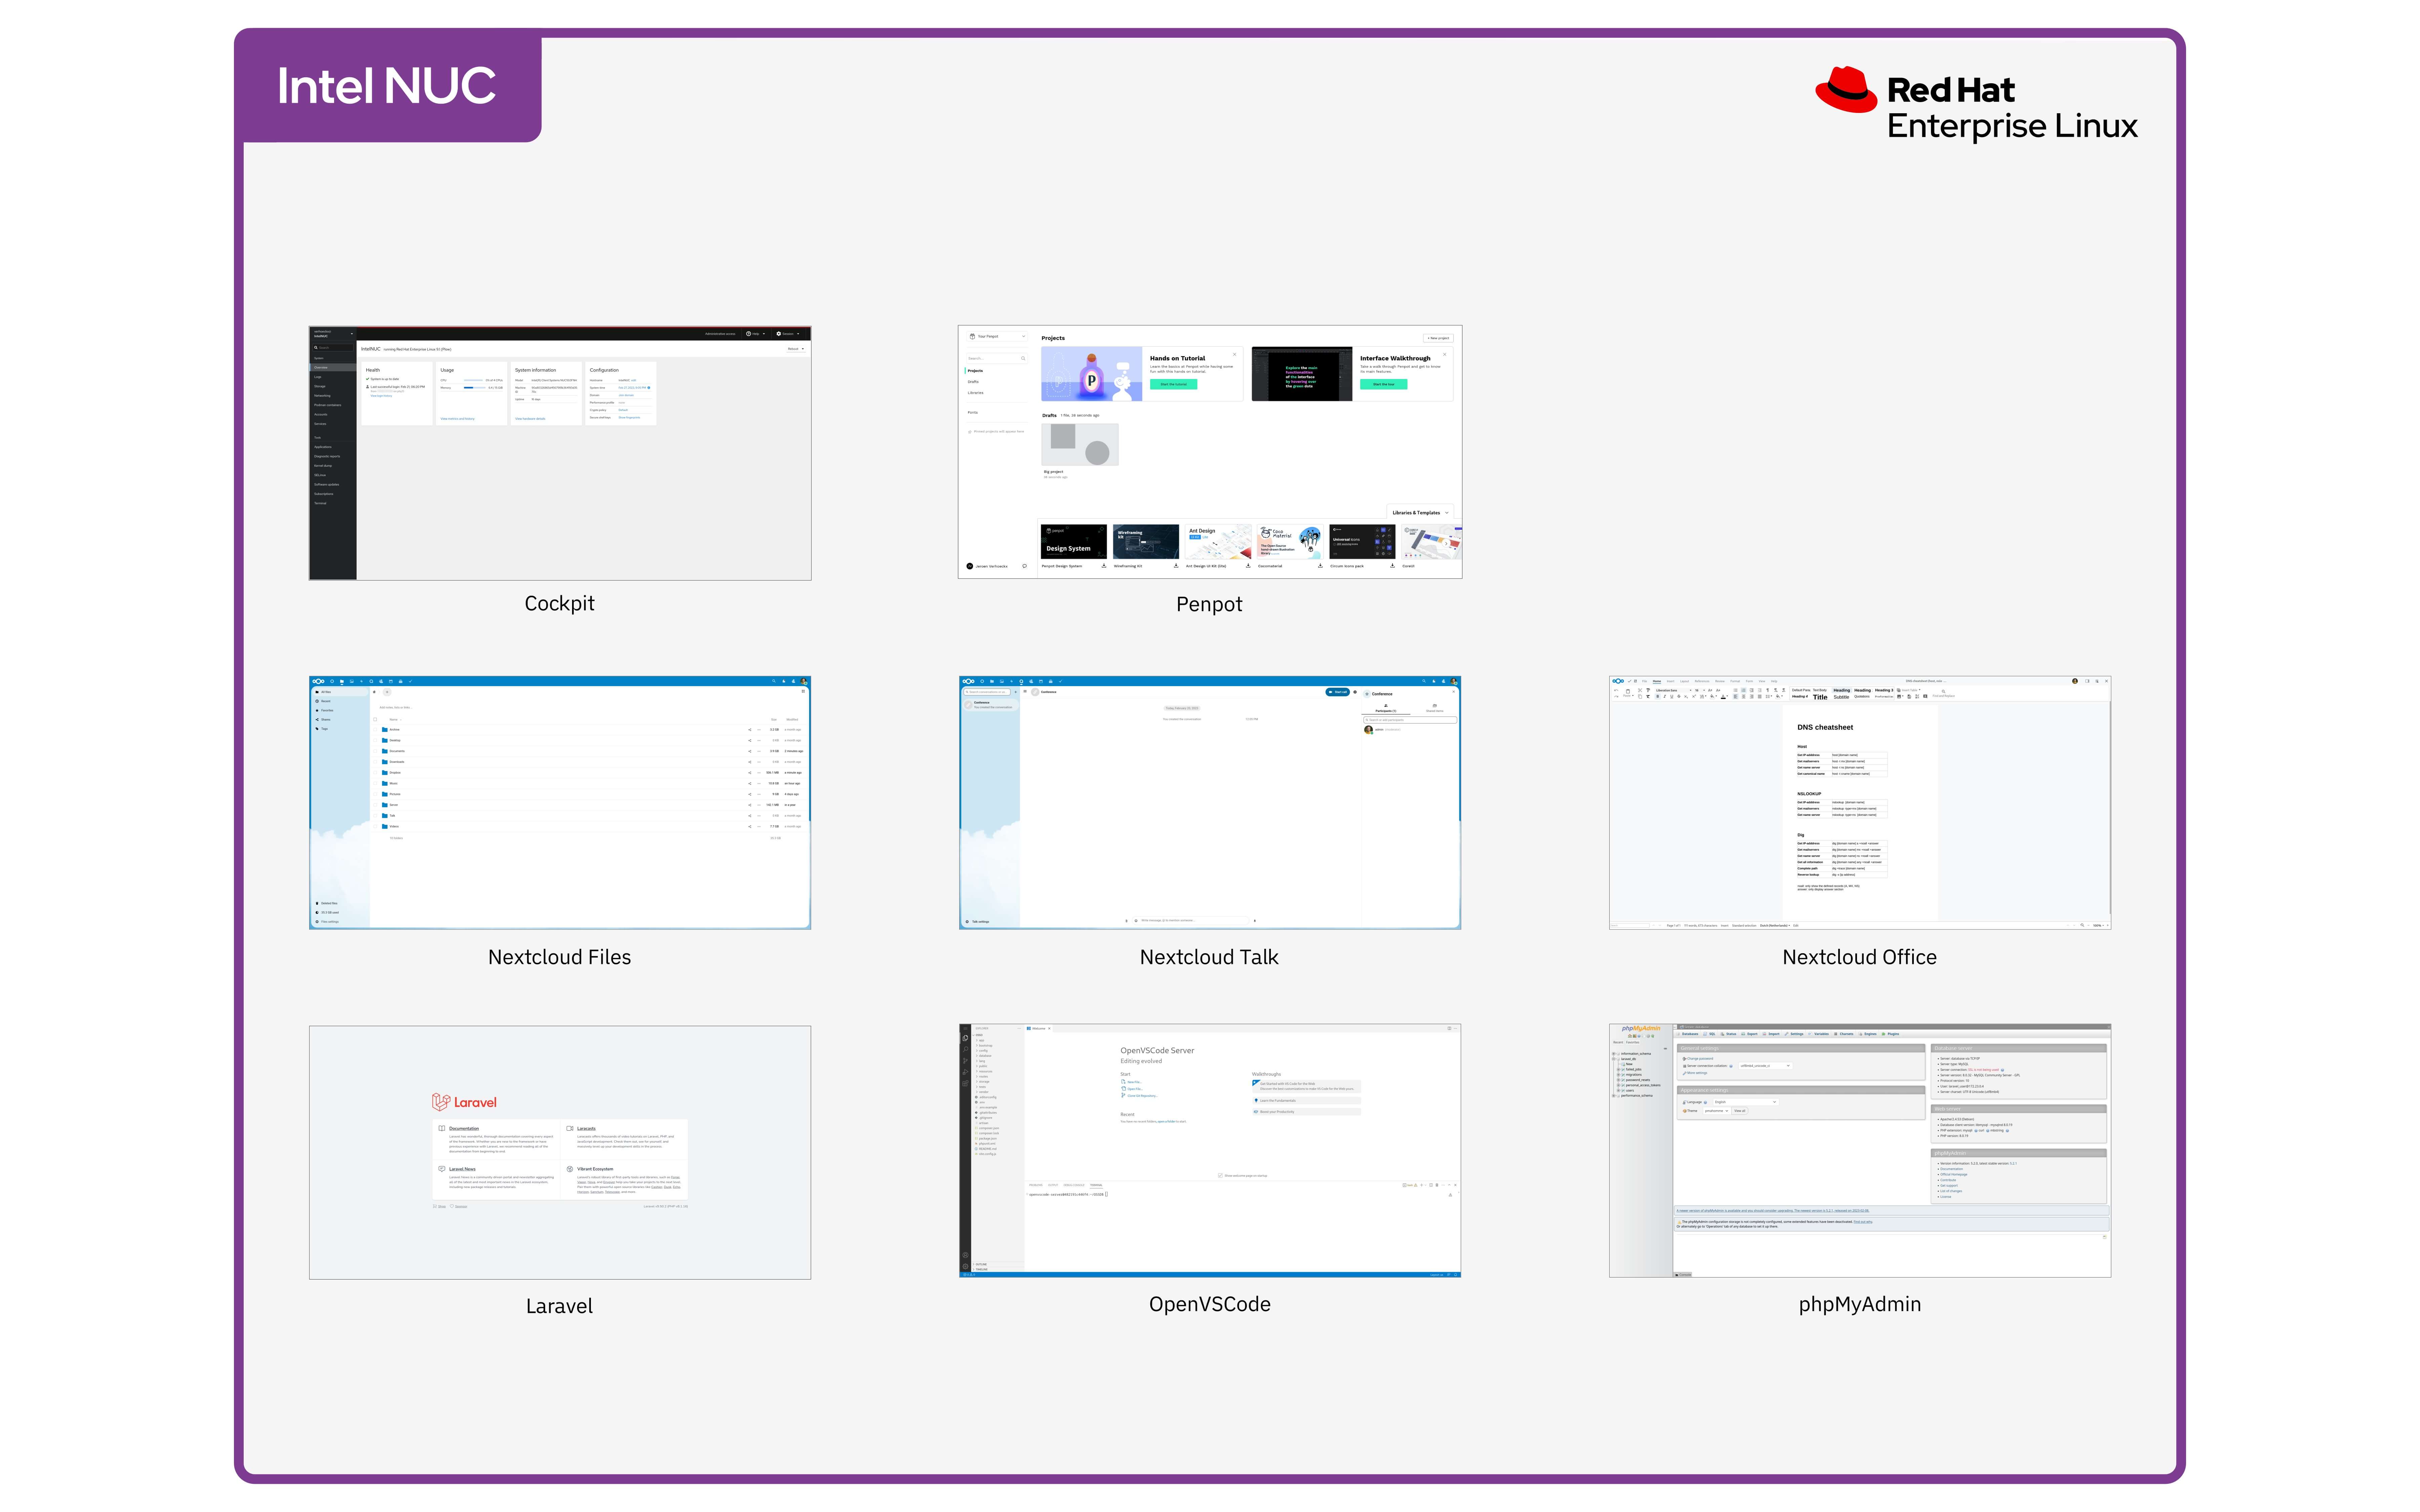
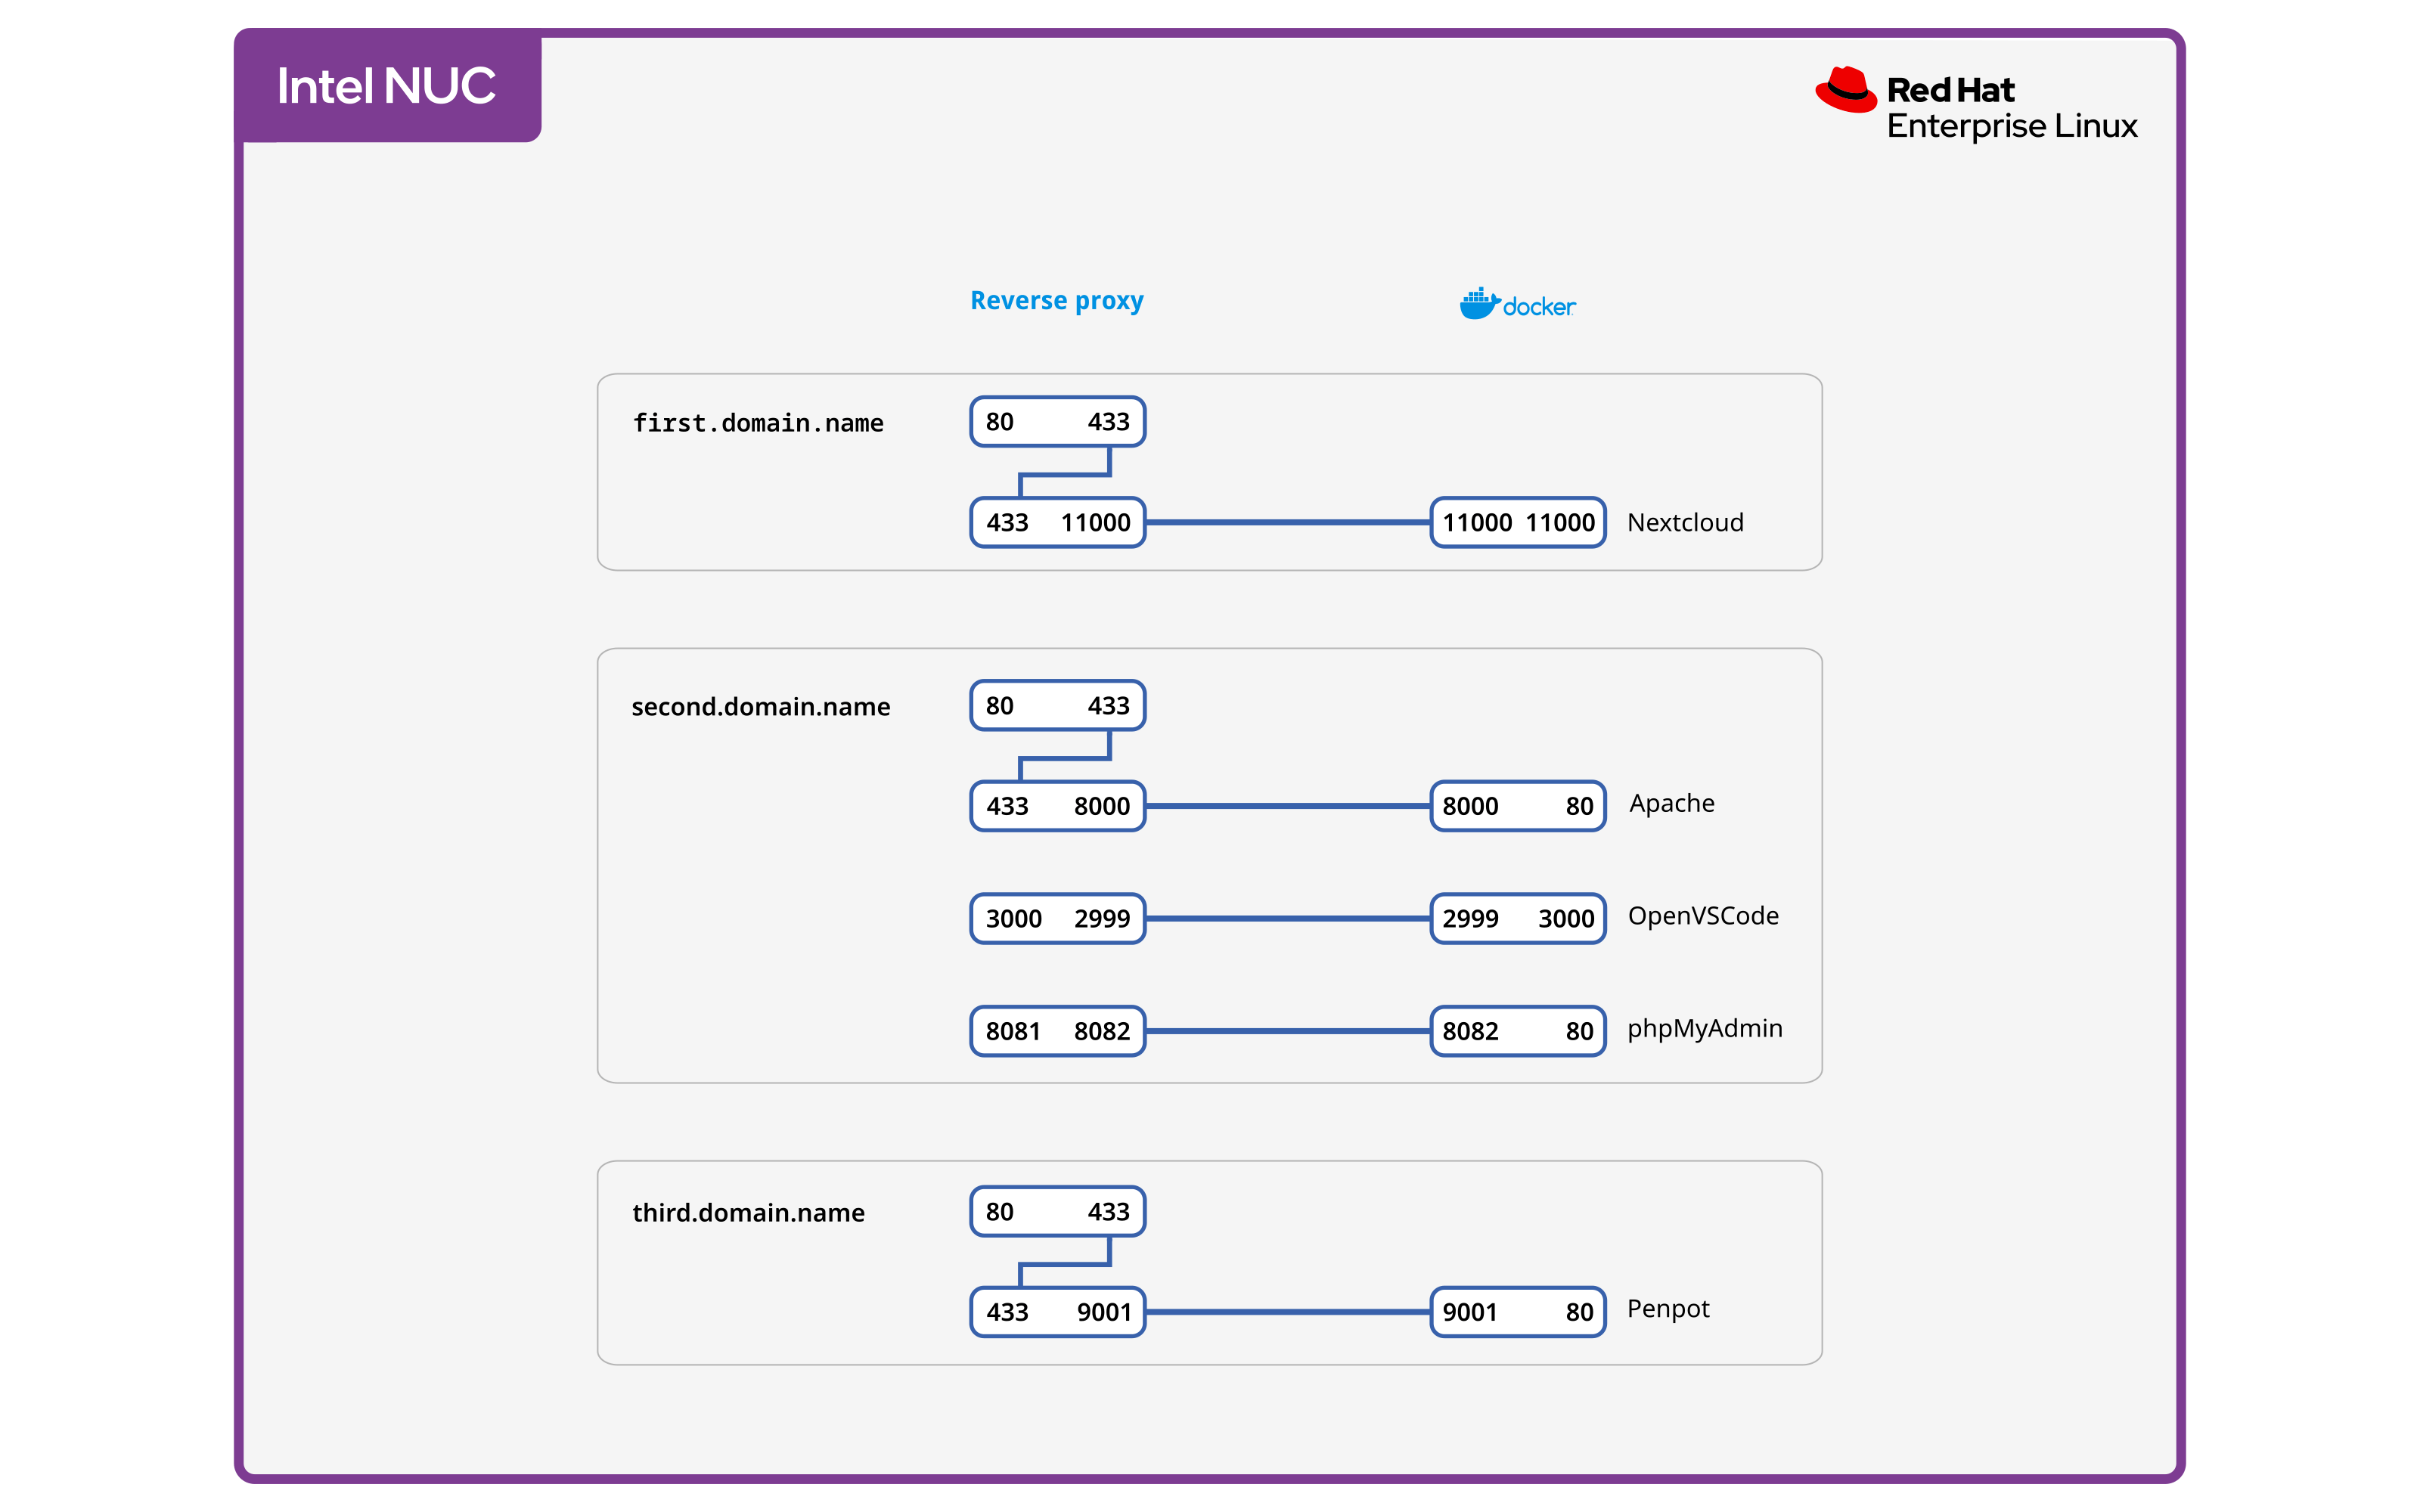
Below you can find a diagram of the software setup.

The image above shows all the containers that will be running when you have installed Nextcloud with Docker on the server. What is not shown, is the reverse proxy that directs all internet traffic to the container Master
Screenshots
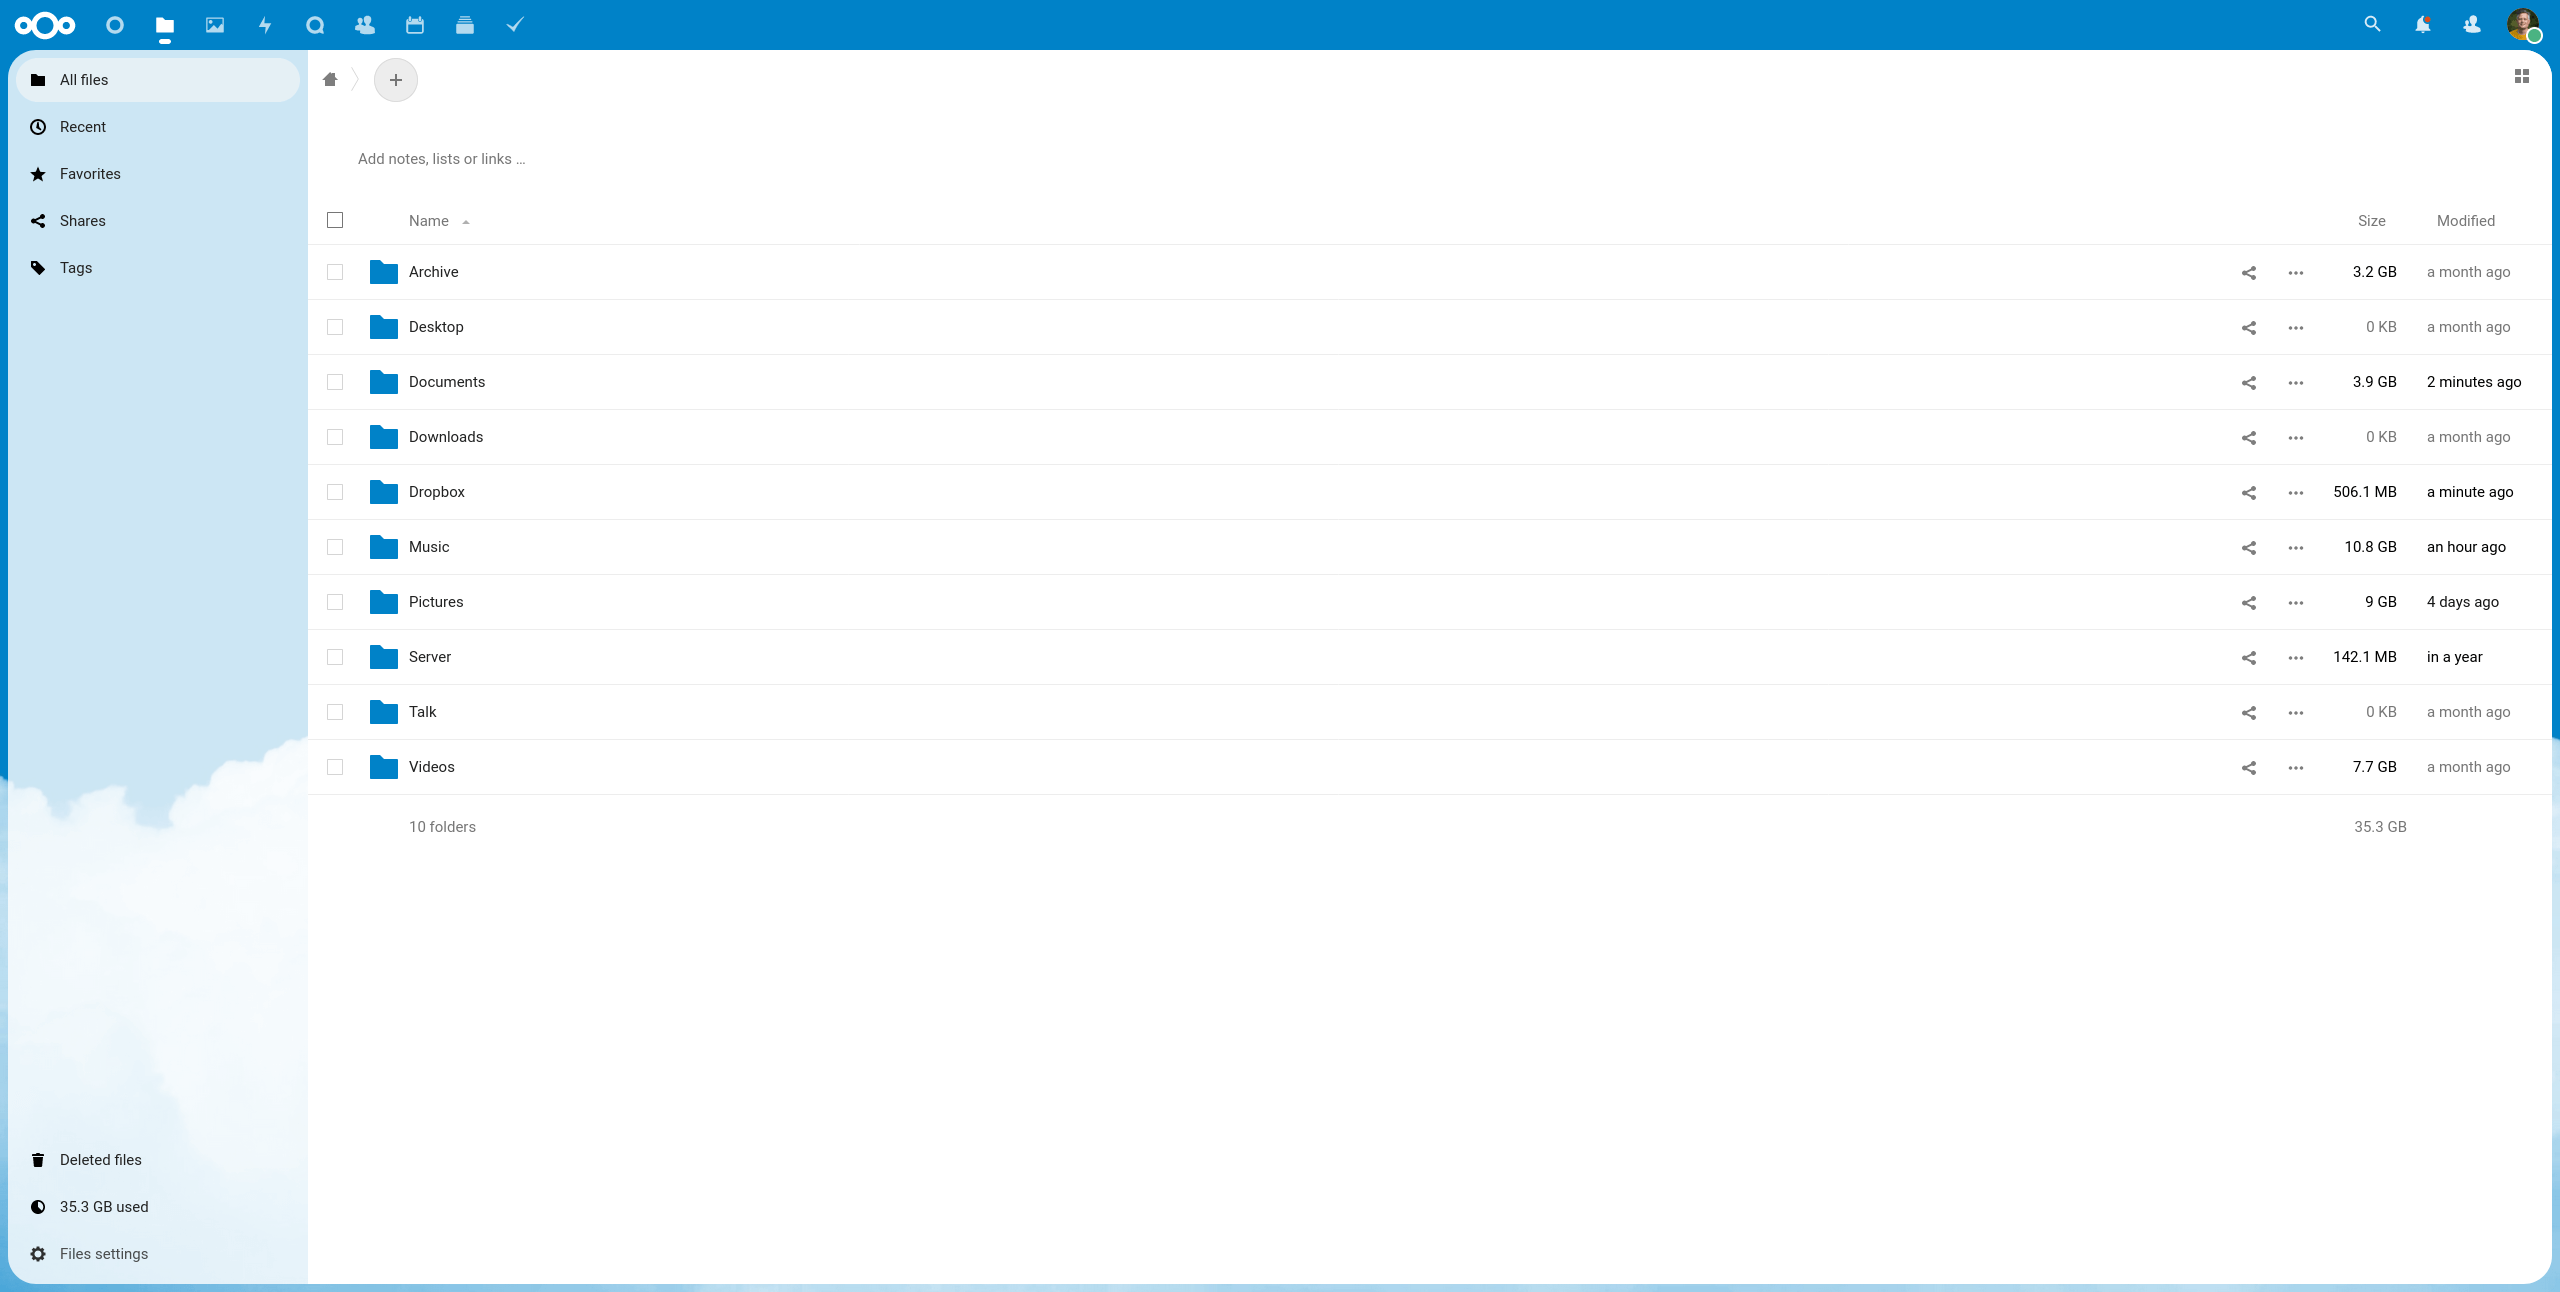

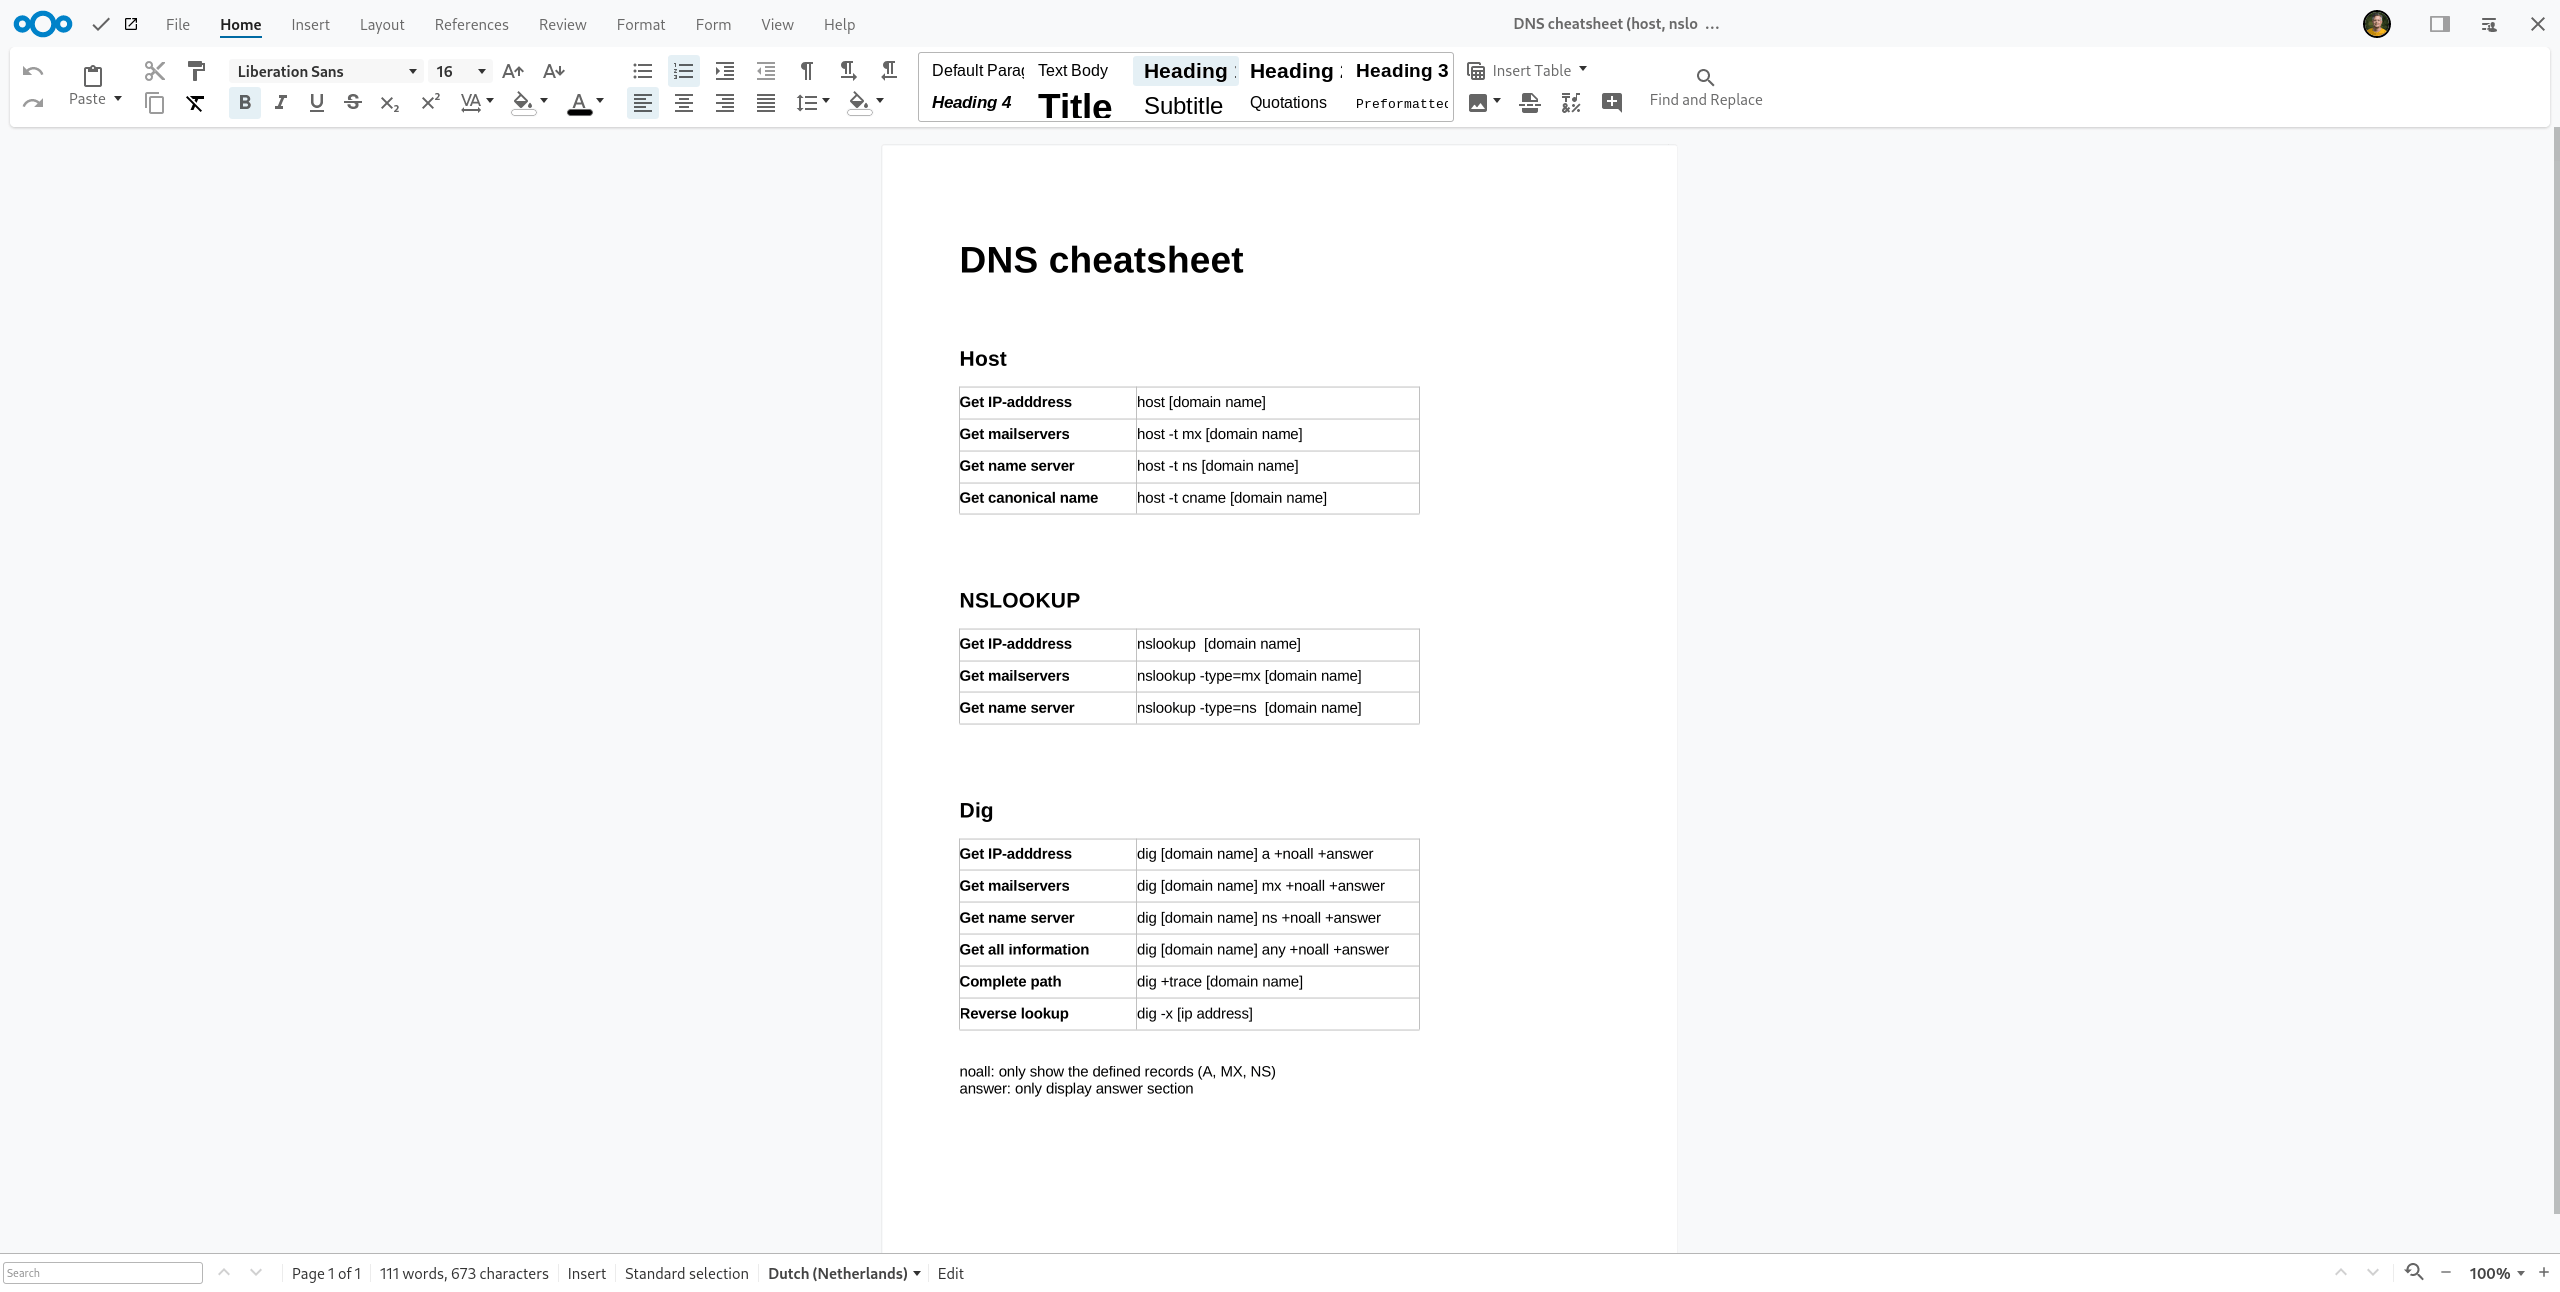
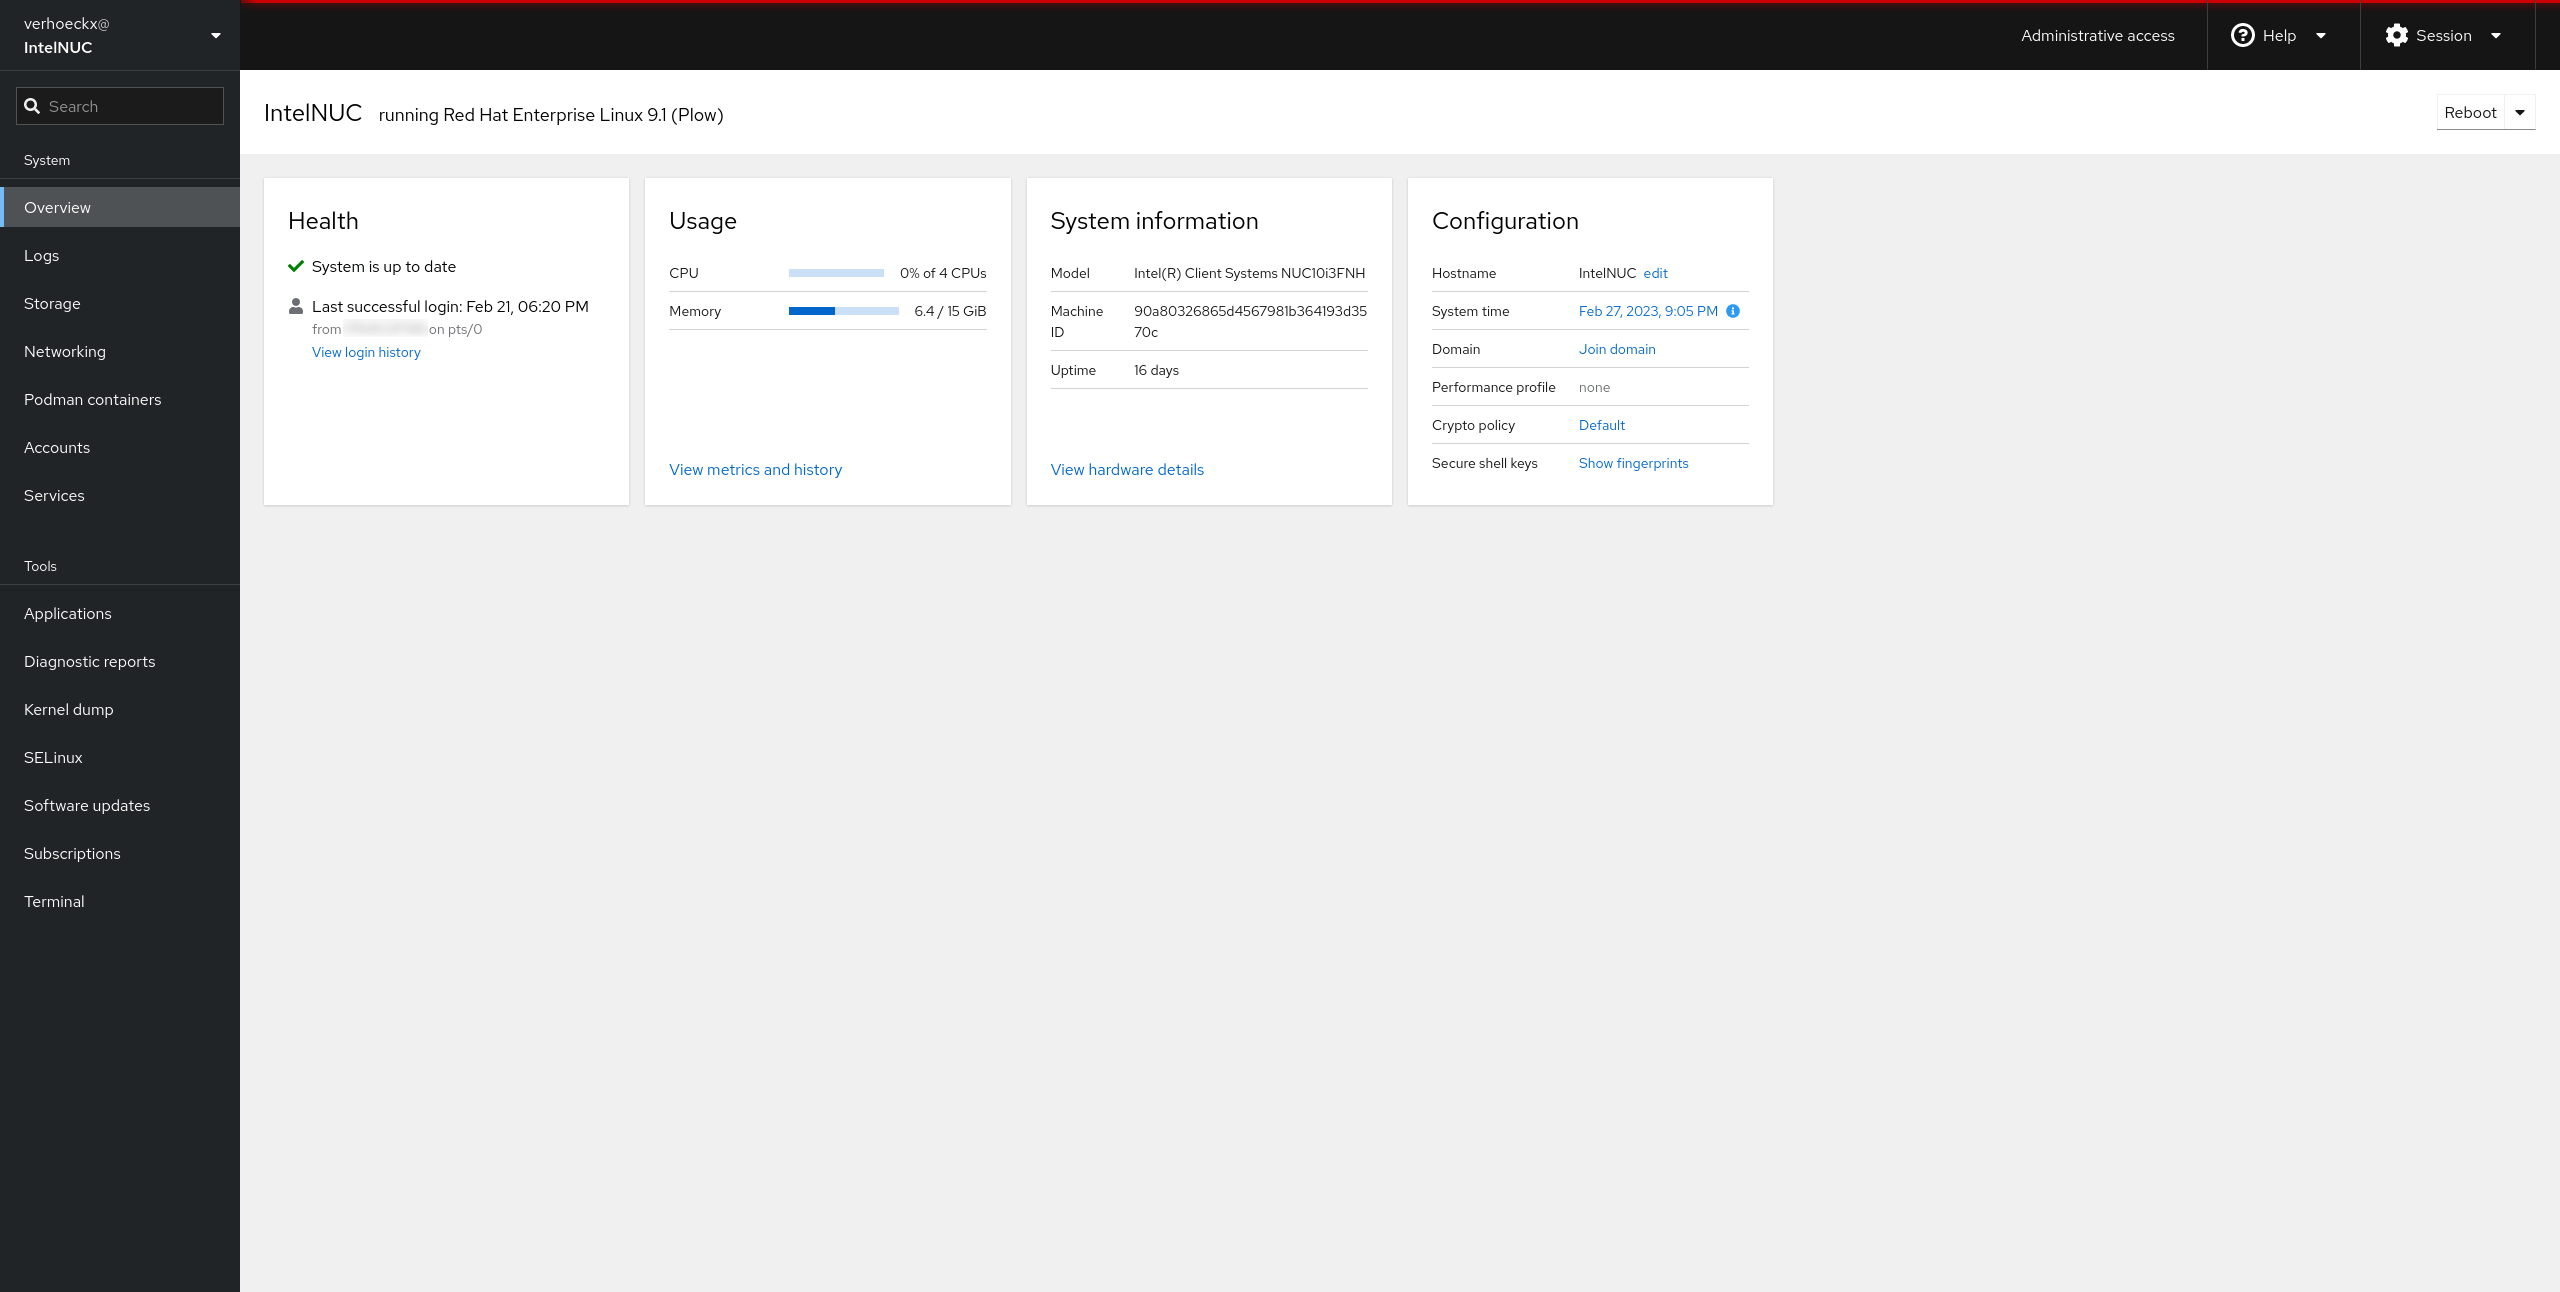
A few screenshots of the applications that will be running as part of Nextcloud. The exception is Cockpit. Cockpit is a server management application from Red Hat and runs separate from Nextcloud.
Contact
If you have any questions or just want to give some feedback, you can e-mail using the contact form of this website.
Registration
Get a Red Hat account
The first step is to create a free Red Hat account.
- Go to redhat.com
- Click on
Log in - Click on
Register now - Fill in the form and click on
Create my account
Get a Developer Subscription
For downloading Red Hat Enterprise Linux you need the No-Cost Red Hat Developer Subscription. You can get this No-Cost Red Hat Developer Subscription when you join the Red Hat Developer Program
- Go to developers.redhat.com/register
- Use the same e-mail address as in the previous step.
- You are now asked to log in (instead of filling in the complete form).
- Confirm when asked.
After joining the Red Hat Developer Program, the No-Cost Red Hat Developer Subscription is added to your account automatically. This No-Cost subscription gives you the right to install Red Hat Enterprise Linux up to 16 machines
Create install disk
Download RHEL
- Go to Red Hat Customer Portal
- Click on
Products & Services - Click on
Infrastructure and Management - Click on
Red Hat Enterprise Linux - Click on
Download version 9.1 - Download
Red Hat Enterprise Linux 9.1 Binary DVD
You can download Red Hat Enterprise Linux on multiple locations on the website of Red Hat, but the advantage of this location is that it also shows the checksums of the ISO files.
The ISO file is so big (9.1 GB), because it contains all versions of Red Hat Enterprise Linux (server, workstation, etc.) and all kinds of development tools.
Verify the download
It's important to know that the ISO file that we downloaded hasn't been corrupted during the download. To verify that the ISO file hasn't been corrupted, follow the steps below.
1. Go to the location where you saved the ISO image.
2. Run the following command.
sha256sum rhel-baseos-9.1-x86_64-dvd.iso3. Check if the output is the same as the checksum on the website.
Create a bootable USB
For creating a bootable USB drive with Red Hat Enterprise Linux you need a USB drive of at least 16 GB (the image of Red Hat Enterprise Linux is 9.1 GB).
For writing the ISO file to the USB drive we are going to use Fedora Media Writer
The benefit of using Fedora Media Writer is that, after writing the ISO file to the USB drive, it also checks the written data.
- Insert a USB drive into your computer.
- Open Fedora Media Writer.
- Select the ISO file and the USB drive.
- Write the ISO file to the USB drive.
Install RHEL
Connect the hardware
- Connect the Intel NUC with a network cable to the router.
- Connect the Intel NUC with a HDMI cable to a monitor.
- Connect a mouse and a keyboard to the Intel NUC.
- Connect the adapter and power cable to a power outlet.
- Insert the USB drive in a USB port.
Remove an old installation
If you have an old version of Red Hat Enterprise Linux installed, you can remove it completely by removing all the partitions on the hard drive. This way you will start with a complete clean slate for your installation.
- Download
GParted - Create a bootable USB with
Fedora Media Writer
An USB drive of 1 GB is enough (GParted is 508 MB). The procedure to create a bootable USB is described at the section 'Create a bootable USB'. Bootthe Intel NUC with the USB inserted.- Select
GParted Live - Keep the option
Policy for handling keymapsonDon't touch keymap - Select the language you prefer (English is
02). - Type in
0to start GParted. - Select a partition and click on
Delete the selected partition
To unlock a partition,deactivateit first. - Repeat step 8 until all partition are removed.
- Click on
Apply All Operations - Double click on
Exitand selectShutdown - Remove the USB drive.
The actual installation
Warning: it's only possible to enable the Ethernet connection in step 12 if there is a network cable connected to the Intel NUC. The Ethernet connection must be enabled because otherwise you won't have a network connection after the installation!
Don't use the automatic storage configuration. It creates multiple maximised XFS partitions (one for the normal user and one for root) which can't be shrunk!
- Press the power button
;-)
If the Intel NUC doesn't boot from the USB device, you can pressF10to get into the boot menu. - Select
Test this media & install Red Hat Enterprise Linux 9.1 - Select the language for the installation.
- Keyboard: change if necessary.
- Language Support: change if necessary.
- Time & Date: select a city to set the time and date.
- Connect to Red Hat: keep it on
Not Registered - Installation Source: keep it on
Local media - Software Selection: select the base environment
Minimal Install - Installation Destination:
SelectCustomunderStorage Configurationand click onDone
To add a partition click on the plus sign (+).
a. Add a partition with the mount point/boot/efiand a capacity of600 MiB
b. Add a partition with the mount point/bootand a capacity of1 GiB
c. Add a partition with the mount pointswap(without the / ) and a capacity of8 GiB(for a system with 16 to 64 GB RAM).
d. Add a partition with the mount point/and leave the capacity empty
(When you leave the capacity empty allavailablespace will be used.)
For setting up the above partition scheme, I used the following documentation:
Performing a standard RHEL 9 installation
What is the recommended swap size for Red Hat platforms?
Click onDone
ClickAccept Changes - KDUMP: keep it on enabled.
- Network & Host name:
enablethe Ethernet connection.
Disable the WIFI connection if there is one.
Here you can also change the host name of the Intel NUC. - Security Policy: deselect the switch
Apply security policy. - Root Password: set a root password.
- User Creation: create at least one user.
Make this useradministrator. - Review all the settings
:-). - Start the Installation by clicking on
Begin Installation
On my system the installation took around 3 minutes. - Reboot the system by clicking on
Reboot system - Log in and power-off the system with the command
poweroff
Connect to the network
Now you installed Red Hat Enterprise Linux it's time to put the Intel NUC at the location that you want and connect the Intel NUC with an Ethernet cable to the router or switch. After you have done so, press the power button to power-on the device.
To log back in the system we need to know the IP address it got from the router. The only way to know this, is to log in to the router and see which IP address was assigned to the device.
- Open a browser and go to the IP address
192.168.1.1
It's possible that your router can be found on another IP address. In that case, consult the documentation of your router. - Log in the router with the username and password.
If you don't know the username and password, consult the documentation of your router. - Look up the IP address in the
network table
On my router (Netgear) this table is called 'Attached Devices' but the manufacturer of your router may have given it another name. Try to find something similar. Look for the device name to find its IP address. - Write down the IP address.
We need this IP address to log into the system with SSH.
Log in to the system with SSH
Now that we have the IP address of the Intel NUC, we can log in to the system with SSH.
1. Open a terminal and run the command below.
ssh [username]@[IP address]2. Enter your password.
If you don't want to use an IP address to log in to your server, you can add a domain name to the host file (/etc/hosts) on your computer.
a. Log out of the server.
b. Open the host file.
sudo vim /etc/hostsc. Add the following line and save the file.
[IP address server] [domain name]d. Now you can use the domain name to log in to your server.
ssh [username]@[domain name]Register the system
Get the username of your Red Hat account
To register the server with Red Hat you need to know the username (Red Hat login) of your Red Hat account. Follow the steps below to find your Red Hat username.
- Go to redhat.com
- Click on
Log inand log in with your e-mail address and password. - Click on
Account Details - Click on
Login & password - Your Red Hat username is your
Red Hat login - Write it down somewhere.
The actual registration
The registration must be done on the server.
1. Register your No-Cost Red Hat Developer Subscription.
sudo subscription-manager register --username [username Red Hat account] --password [password Red Hat account]2. Set the role of the system to Red Hat Enterprise Linux Server
sudo subscription-manager role --set="Red Hat Enterprise Linux Server"3. Set the service level the the system to Self-Support
sudo subscription-manager service-level --set="Self-Support"4. Set the usage of the system to Development/Test
sudo subscription-manager usage --set="Development/Test"5. Attach the Intel NUC to your No-Cost Red Hat Developer Subscription
sudo subscription-manager attachThe No-Cost Red Hat developer subscription gives you the right to install Red Hat Enterprise Linux on 16 (virtual) machines. When you attach the Intel NUC to your subscription it is counted as one of those 16 machines / installations.
When you go to the Red Hat Customer Portal you will see that you have one "Red Hat Developer Subscription for Individuals" and that 1 of 16 installations (6%) is being used (see Entitlement Usage).
Update the system
Run the following command.
sudo dnf upgradeEnable auto update
1. Install the package dnf-automatic
sudo dnf install dnf-automatic2. Install the command line text editor vim
sudo dnf install vim3. Open the file /etc/dnf/automatic.conf
sudo vim /etc/dnf/automatic.conf4. Set apply_updates to yes
5. Enable and start the service.
sudo systemctl enable --now dnf-automatic.timer6. Check if the service is running.
sudo systemctl list-timers *dnf-*The system will now check every day at 06:00 for available updates. If there is an update, the packages will be downloaded and installed.
You can check the default schedule here:
cat /usr/lib/systemd/system/dnf-automatic.timerInstall Cockpit
Now that we finished the installation of Red Hat Enterprise Linux we can install Cockpit. Cockpit is the official server management software of Red Hat Enterprise Linux (but it is renamed to RHEL Web Console).
1. Install Cockpit.
sudo dnf install cockpit2. Enable Cockpit in systemd
sudo systemctl enable cockpit.socket3. Start the application Cockpit.
sudo systemctl start cockpit.socket4. Open Cockpit in a browser.
Open a browser and go to the address below.
[IP address Intel NUC]:9090When you visit the address you probably get a warning that the website can't be trusted. Ignore this message and add a security exception to the website. After you have added the security exception you will see the login page of Cockpit.
You can now log in with the user name and password that you created during the installation of Red Hat Enterprise Linux.
Securing the system
Securing SSH
Enable public-key authentication
By default SSH uses a username and password to log in to the system. While this is a safe way to log in to the system, it doesn't prevent your machine from a brute force SSH attack. If we configure the system in such a way that it uses public-key authentication, then a brute force SSH attack becomes impossible. This also takes away the need to log in with a password.
After you configured the server with public-key encryption, you will only be able to log in to the server with the laptop or computer on which you configured the key-pair (the public and private key).
1. Go back to the laptop or computer that you used to log in to the server.
2. Log in with your normal user account.
3. Open a terminal.
4. Generate the public and private key pair (using the RSA-algorithm).
ssh-keygen -t rsaWhen you get the question to enter a passphrase, just press enter. This way you don't configure a passphrase and you will be able to log in to the Intel NUC without a password.
The private key can be found here:
~/.ssh/id_rsaAnd the public key can be found here:
~/.ssh/id_rsa.pub5. Copy the public key to the user account on your Intel NUC.
ssh-copy-id -i ~/.ssh/id_rsa.pub [username]@[IP address]After you have installed the public key on the server, you can log in to the Intel NUC without a password. This may seem insecure but remember that you now use public-key authentication in the background!
Disable all password authentication
While we have enabled public-key authentication for one user on the server for one account on your laptop, it's still possible to log in to the server with just a password from another account or from another computer! In other words: we are still not protected from a brute force SSH attack!
To finish our protection to a brute force SSH attack we have to disable all password authentication on the server. This has the advantage that the root account now also is blocked.
1. Open the file /etc/ssh/sshd_config
sudo vim /etc/ssh/sshd_config2. Find the line with the text PasswordAuthentication
With the forward slash (/) you can search for a word in the document.
For example:
/PasswordAuthentication3. Remove the # and change yes into no.
4. Reload the SSH daemon.
sudo systemctl reload sshdNow that we have enabled public-key authentication and disabled all password authentication, there is only one way to log in to the server and that's from your user account on your laptop to the user account on the server. Save the usernames and passwords of both user accounts (otherwise you won't be able to log in to the server anymore)!
Secure Cockpit
Block the root account
- Log in to
Cockpit - Open the tab
Accounts - Click on the
root account - Select
Disallow interactive password
It's now not possible anymore to log in Cockpit with the root account.
Internet connection
Now we have secured SSH and Cockpit we can safely connect the Intel NUC to the internet. The first step is to enable port forwarding on the router, so that internet traffic that arrives at the router can reach the Intel NUC.
Enable port forwarding
Port forwarding has to be enabled for the following ports: 22 (SSH), 80 (HTTP), 443 (HTTPS) and 9090 (Cockpit).
- Open a browser and go to the IP address
192.168.1.1
It's possible that your router can be found on another IP address. In that case, consult the documentation of your router. - Log in on the router with the username and password.
If you don't know the username and password, consult the documentation of your router. - Enable port forwarding on the router.
How you have to do this, is different for every router. On my Netgear router I had to follow the following steps:
a. Click on the tabAdvanced
b. Click onAdvanced Setup
c. Click onPort Forwarding / Port Triggering
For every service / port:
d. Click onAdd Custom Service
e. Give the service a name (SSH / HTTP / HTTPS / Cockpit).
f. External Starting Port and External Ending Port: the port number (22 / 80 / 443 / 9090)
g. Internal Starting Port and Internal Ending Port: the port number (22 / 80 / 443 / 9090)
h. Internal IP address: thelocal IP addressof the Intel NUC.
i. Click onApply
You can now reach the Intel NUC using the public IP address of your router.
You can find the public IP address of your router with the following command:
host myip.opendns.com resolver1.opendns.comTry to log in to the server with SSH and the public IP address:
ssh [username]@[Public IP address of the router]And try to log in to Cockpit with the public IP address:
[Public IP address of the router]:9090Configuring DNS
To be able to reach the server with a domain name, you need to add a domain name to a DNS server on the internet.
Here you have a few options:
- If you already have a registered domain you can add a subdomain and point it to the public IP address of the router. The advantage is that you can add the DNS entry yourself and you don't have to pay for an extra service. The disadvantage is that the IP address can change and if it does, you loose the connection with the server. If this happens, the only solution is to edit the DNS entry manually again.
- You register a new domain name and make it point to the public IP address of the router. This has the same disadvantage as the first solution.
- You register a domain name with a
Dynamic DNS service providerand make it point to the public IP address of your router. The advantage of using a Dynamic DNS service provider is that they actively monitor your router and that they change the DNS entry automatically if they see that the public IP address of your router has changed. The disadvantage of such a service is that you have to rely on a third party service.
Whatever solution you choose, make sure that at the end of this step you have a registered domain (or subdomain) name pointing to your router. If necessary, call your web hosting provider for more information.
Check if DNS works correctly by entering the domain name followed by the port number of Cockpit (:9090). If successful, you get the login screen of Cockpit.
Set up Dynamic DNS
In our setup, we make use of at least two (sub) domain names: one for Cockpit and one for Nextcloud. All (sub) domain names point to the same IP address: the IP address of the router. The problem with this setup is that the IP address of the router can change because the router is connected to an Internet Service provider which uses dynamic IP addresses to connect a device (the router) to their network. To address this issue of changing IP addresses, we can sign up for a dynamic DNS provider that tracks whether the IP address of the router has changed and changes the DNS entry accordingly.
After a long search, I found deSEC, a dynamic DNS provider that's not only free (it is run as a non-profit organisation) but also runs on 100% open source software!
Because multiple domain names are connected to the router we first have to determine which domain name will be our main domain name and which domain names will be aliases to that domain name. Which domain name will be the main domain name and which domain names will be the aliases doesn't matter, so this is something you have to choose yourself.
1. Go to the website of deSEC, click on Create account and fill in the form.
Select the bullet in front of the text No, I'll add one later (we will set up the main domain name after logging in).
2. Add the main domain name to deSEC.
a. Click on the tab Domain Management
b. Click on the plus icon at the right side.
c. Enter the main domain name and click on Save.
When you get the pop-over with the setup instructions, write down the addresses of the name servers of deSEC.
3. Create a new security token.
a. Click on the tab Token Management
b. Click on the plus icon at the right side.
c. Give the token a name and click on Save.
d. Important: in the new pop-over that is displayed now, copy and paste the security token that is displayed at the top in the green bar. This security token is only displayed once so make sure that you save it somewhere.
4. Log in the control panel of your current web hosting provider and go to the DNS settings.
5. Remove the A record for your main (sub) domain.
6. Add for the main (sub) domain, two name server (NS) records: one for the primary name server and one for the secondary name server of deSEC.
Example:
[main (sub) domain]     NS    ns1.desec.io.     // primary name server of deSEC
[main (sub) domain]     NS    ns2.desec.org.    // secondary name server of deSEC
7. Add CNAME records to all other (sub) domains. They should all point to the main (sub) domain.
Example:
[A (sub) domain]      CNAME    [main (sub) domain]
[B (sub) domain]      CNAME    [main (sub) domain]
If you already created A records for the other (sub) domains, remove them first.
8. Log in on the server.
ssh [username]@[IP address or domain name]9. Add the Extra Packages for Enterprise Linux (EPEL) repository.
sudo subscription-manager repos --enable codeready-builder-for-rhel-9-$(arch)-rpms
sudo dnf install https://dl.fedoraproject.org/pub/epel/epel-release-latest-9.noarch.rpm
10. Install the package ddlclient
sudo dnf install ddclient11. Open the ddclient configuration file.
sudo vim /etc/ddclient.conf12. Go to the end of the file and add the code below.
# deSEC configuration
use=if, if=eth0
protocol=dyndns2
use=cmd, cmd='curl https://checkipv4.dedyn.io/'
server=update.dedyn.io
login=[domain]
password='[token]'
[domain]
Replace domain with your main domain name and token with the token you created in step 3.
13. Test the configuration.
sudo ddclient -forceIf the configuration works fine, you should see the following message:
SUCCESS: updating [your main domain]: good: IP address set to [IP address router]You can run host -t ns [your main domain name] to see if the domain name is resolved by deSEC (install the command host with sudo dnf install bind-utils). Be aware that it can take some time (hours) before all (sub) domains are resolved correctly.
Install Nextcloud AIO
Open ports
1. Open port 80 (HTTP) and port 443 (HTTPS).
sudo firewall-cmd --permanent --zone=public --add-service=http
sudo firewall-cmd --permanent --zone=public --add-service=https
2. Open port 8080 and 8443 for the Nextloud AIO interface.
sudo firewall-cmd --permanent --zone=public --add-port=8080/tcp
sudo firewall-cmd --permanent --zone=public --add-port=8443/tcp
3. Open port 3478 for Nextcloud Talk (TCP and UDP).
sudo firewall-cmd --permanent --zone=public --add-port=3478/tcp
sudo firewall-cmd --permanent --zone=public --add-port=3478/udp
4. Reload the firewalld
sudo firewall-cmd --reload5. Open port 8080, 8443 and 3478 on your router and forward them to your server.
Configure firewalld
Use iptables instead of nftables.
sudo sed -i 's/FirewallBackend=nftables/FirewallBackend=iptables/g' /etc/firewalld/firewalld.conf
sudo systemctl restart firewalld docker
Install Docker
1. Add the Docker Community Edition (CE) repository.
sudo dnf config-manager --add-repo https://download.docker.com/linux/centos/docker-ce.repo2. Install Docker CE, containerd and docker-compose
sudo dnf install docker-ce docker-ce-cli containerd.io docker-compose-plugin3. Enable Docker and containerd in systemd
sudo systemctl enable docker
sudo systemctl enable containerd
4. Start Docker.
sudo systemctl start docker5. Check if Docker is running correctly.
sudo docker run hello-worldThis command above downloads a test image and runs it in a container. When the container runs, it prints a message and exits.
Disable SELinux
sudo setenforce 0After the installation of Nextcloud AIO, we will enable SELinux again and see what happens.
Install Nextcloud AIO
1. Create and run a container from the Nextcloud AIO image.
sudo docker run -d \
--sig-proxy=false \
--name nextcloud-aio-mastercontainer \
--restart always \
--publish 80:80 \
--publish 8080:8080 \
--publish 8443:8443 \
--volume nextcloud_aio_mastercontainer:/mnt/docker-aio-config \
--volume /var/run/docker.sock:/var/run/docker.sock:ro \
nextcloud/all-in-one:latest
The only difference between this command and the command on the Github page of Nextcloud AIO is that I added the option -d so that the master container is running as a background process. This way the command line remains free for other commands.
-d                      Run the container in detached mode (as a background proces).
--sig-proxy=false       Exit the container shell with CTRL + C without shutting down the container.
--name                  The name of the container to run.
--restart always        Start the container when Docker starts.
--publish               Map the host port(-s) with the container port(-s).
--volume                Mount a volume to a directory inside the container.

The line with docker.sock mounts the Docker socket inside the container in order to start all other containers.
The last line is the name of the image that will be downloaded.
Wondering where all your data in Nextcloud will be stored? Well, when the container with the name nextcloud-aio-nextcloud gets created, a volume with the name nextcloud_aio_nextcloud_data is also created and this volume is then mounted to the directory /var/lib/docker/volumes/nextcloud_aio_nextcloud_data/ on the host. It's this location where all your files will be stored.
2. Open theNextcloud AIO interface
You can open Nextcloud on the following address:
https://[local ip address of your server]:8080
When you open the Nextcloud AIO interface you get a message that a password has been created for you. Save this password, click on Open Nextcloud AIO login and log in with the password.
3. In the next window you get the question which domain you want to use for your Nextcloud installation. Enter your domain nameand click on Submit
4. Now it's time to select which containers (here they are called addons) should be downloaded and run. Select the containers you would like to use and click on Save changes (do not start the containers yet).
5. Enter the time zone your are in and click on Submit
All available time zones can be found here (in the column TZ database name).
6. Start the containers by clicking on Start containers
Wait patiently until all the images of the containers are downloaded and started. Click on Reload to check the status.
7. When all the containers are started, the username and password of Nextcloud are shown. Write them down somewhere. Start Nextcloud by clicking on Open your Nextcloud
8. Log in and start using Nextcloud!!
Set up a backup directory
While we have finished the installation, there is still one thing to do: set up the backup directory of Nextcloud! For doing so, you have to go back to the Nextcloud AIO interface. You can go back to the Nextcloud AIO interface by clicking on the Link Open Nextcloud AIO interface in the Administration settings of Nextcloud.
- Go back to the command line and create a backup directory with the command
mkdir. The directory doesn't need to have any special permissions. - Log in the Nextcloud AIO interface.
- Enter
the address of the backup directoryon the host and click on Submit. - After you have clicked on Submit, the encryption password of the backups is shown. Save this encryption password at a safe location
- Click on
Create backupto make your first backup.
When you click on Create backup, all containers are stopped. Click onReloadto reload the interface. - Start the containers by clicking on
Start containers
Enable SELinux
sudo setenforce 1After enabling SELinux, I was surprised that everything kept working fine! No need to debug SELinux!
Add a reverse proxy
Stop containers
1. Stop all running container.
Log in the Nextcloud and click on the link Open Nextcloud AIO interface in the Administration settings. Click on Stop containers.
2. Stop the master container.
sudo docker stop nextcloud-aio-mastercontainerInstall Apache
1. Install the Apache web server (on the host).
sudo dnf install httpd2. Enable the Apache web server in systemd
sudo systemctl enable httpd3. Install the Apache module mod_ssl
sudo dnf install mod_ssl4. Enable HTTP connections in SELinux
sudo setsebool -P httpd_can_network_connect on5. Go to the directory /etc/httpd/conf.d
cd /etc/httpd/conf.d6. Create a configuration file for the reverse proxy.
sudo vim reverseproxy.conf7. Add the following temporary code.
<VirtualHost *:80>
    ServerName [your domain name]
</VirtualHost>

<VirtualHost *:443>
    ServerName [your domain name]
</VirtualHost>
When we ask Certbot to generate a SSL certificate, it will add the needed code to the virtual hosts. If you don't add the second virtual host (with port 443), Certbot will create a second file with the location of the certificate. If that happens, you will have to remove that file later.
8. Start the Apache web server.
sudo systemctl start httpdInstall Certbot
For getting a SSL certificate for our domain we are going to use Certbot from the Electronic Frontier Foundation (EFF).
1. Install Snap
sudo dnf install snapdThe package is part of the Extra Packages for Enterprise Linux (EPEL) repository.
2. Enable the snap daemon in systemd
sudo systemctl enable snapd3. Start the snap daemon.
sudo systemctl start snapd4. Enable "classic" snap support (give snaps the same permissions as RPM packages).
sudo ln -s /var/lib/snapd/snap /snap5. Reboot the server to finalise the installation of snapd
sudo reboot6. Log back in.
ssh [username]@[IP address of the server]7. Install snap core
sudo snap install core8. Install the snap certbot with "classic" permissions.
sudo snap install --classic certbot9. Make sure that the command certbot can be run.
sudo ln -s /snap/bin/certbot /usr/bin/certbotGet a SSL certificate
1. Request the certificate from Let's Encrypt
sudo certbot --apache- Enter your e-mail address
- Agree to the Terms of Service
- Agree or disagree to share your e-mail address with the Electronic Frontier Foundation.
- Select the domain name for which you want to request the SSL certificate.
Wait until the certificate is deployed successfully.
2. Restart Apache
sudo systemctl restart httpd3. Test if the renewal of the certificates works.
sudo certbot renew --dry-runAdd the reverse proxy
1. Go to the directory /etc/httpd/conf.d
cd /etc/httpd/conf.d2. Open the reverse proxy configuration file.
sudo vim reverseproxy.conf3. Replace the code with the code below.
<VirtualHost *:80>
    ServerName [your.domain.com]

    RewriteEngine On
    RewriteCond %{HTTPS} off
    RewriteRule (.*) https://%{HTTP_HOST}%{REQUEST_URI}
    RewriteCond %{SERVER_NAME} =[your.domain.com]
    RewriteRule ^ https://%{SERVER_NAME}%{REQUEST_URI} [END,NE,R=permanent]
</VirtualHost>

<VirtualHost *:443>
    ServerName [your.domain.com]

    RewriteEngine On
    ProxyPreserveHost On
    AllowEncodedSlashes NoDecode

    ProxyPass / http://localhost:11000/ nocanon
    ProxyPassReverse / http://localhost:11000/

    RewriteCond %{HTTP:Upgrade} websocket [NC]
    RewriteCond %{HTTP:Connection} upgrade [NC]
    RewriteCond %{THE_REQUEST} "^[a-zA-Z]+ /(.*) HTTP/\d+(\.\d+)?$"
    RewriteRule .? "ws://localhost:11000/%1" [P,L]

    # Enable h2, h2c and http1.1
    Protocols h2 h2c http/1.1

    # Solves slow upload speeds caused by http2
    H2WindowSize 1048576

    # SSL
    SSLEngine on
    Include /etc/letsencrypt/options-ssl-apache.conf
    SSLCertificateFile /etc/letsencrypt/live/[your.domain.com]/fullchain.pem
    SSLCertificateKeyFile /etc/letsencrypt/live/[your.domain.com]/privkey.pem

    # Disable HTTP TRACE method.
    TraceEnable off
    <Files ".ht*">
        Require all denied
    </Files>

    # Support big file uploads
    LimitRequestBody 0
</VirtualHost>
Replace [your.domain.com] with your domain name (five times).
4. Check the configuration file for syntax errors.
sudo apachectl configtest5. Restart Apache.
sudo systemctl restart httpdStart containers
1. Remove the old master container.
sudo docker rm nextcloud-aio-mastercontainer2. Start the master container with some new options.
sudo docker run -d \
--sig-proxy=false \
--name nextcloud-aio-mastercontainer \
--restart always \
--publish 8080:8080 \
-e APACHE_PORT=11000 \
-e APACHE_IP_BINDING=127.0.0.1 \
--volume nextcloud_aio_mastercontainer:/mnt/docker-aio-config \
--volume /var/run/docker.sock:/var/run/docker.sock:ro \
nextcloud/all-in-one:latest
What has changed?
- The options
--publish 80:80and--publish 8443:8443have been removed. - The options
-e APACHE_PORT=11000and-e APACHE_IP_BINDING=127.0.0.1have been added.
3. Open the Nextcloud AIO interface
https://[local IP address of the server]:80804. Enter the Nextcloud AIO password and click on the buttonLog in
5. Click on Start containers to start all other containers.
6. Log back in Nextcloud by clicking on Open your Nextcloud
You can, once again, start using Nextcloud!
Synchronise your files
Install Nextcloud Desktop
You can install Nextcloud Desktop directly from GNOME Software if you have added Flathub as a repository. This is by far the easiest way.
If you want to look up Nextcloud Desktop on Flathub, you can find it here:
https://flathub.org/apps/details/com.nextcloud.desktopclient.nextcloudNextcloud Desktop does have the option Launch on System Startup however this option doesn't work in the Flatpak version of the application. You can solve this, by adding the Nextcloud Desktop app to the Startup Applications list in GNOME Tweaks (which you have to install first).
Clean up the files
- Log in to your Nextcloud installation.
- Go to
Filesand click onAll files - Select all the default files and templates.
- Click on
...Actionsand chooseDelete - Go to
Deleted files - Select all files.
- Click on
...Actionsand chooseDelete permanently
Configure settings
- Launch the application but close the window
Add Nextcloud account
Reason: we have to configure the settings first. - Click on the icon in the system tray of your desktop environment.
If you use GNOME: install the extensionAppIndicator and KStatusNotifierItem Supportto see the system tray. - Select
Settings - Increase the size of the setting
Ask for confirmation before synchronising folders larger thanto a value that is higher than any directory in your home directory. This way you will never be asked to confirm the synchronisation of a directory. Tip: use the applicationGNOME Disk Usage Analyzerto find the size of the directories. - Click on
Edit Ignored Files - Deselect
Sync hidden files
if you don't do this, you a lot of unnecessary files will be uploaded! See the warning below if this option isn't saved. - Click on
OK - Close the window.
In version 3.6.4 of the Nextcloud Desktop app the deselecting of the option Sync hidden files isn't saved and you have to add the expression .* (all hidden files) manually.
1. Open the window Edit Ignored Files
2. Click on Add
3. Type .*
4. Click on OK and click OK again.
Synchronise your files
- Click on the icon in the
system tray - Click on
Add account - Click on
Log in - Enter the address of the Nextcloud server.
After you entered the address and clicked onNext, you are redirected to a web page on your Nextcloud server and asked to log in. This to allow the desktop application access to your Nextcloud installation.
1. Click onLog in
2. Log in with your username and password.
3. Click onGrant access
4. Close the browser window and go back to the desktop application. - Select the home directory (or folder) that you want to synchronise.
- Keep
Synchronize everything from serverselected. - Important: keep
Keep local dataselected in order to keep all your files on your laptop/computer! - Click on
Connect - Wait until all files and directories are synced.
Depending on the number and size of your files this can take several hours!
Exclude Downloads directory
- Create a backup of the
Downloadsdirectory. - Click in the system tray on the Desktop client and choose
Settings Uncheckthe checkbox to the left of the directoryDownloads
A warning will appear that the Downloads directory, including all the data, will be removed from the local file system.- Choose
Apply
The directory Downloads and all the data will now be removed from the local file system. - Create a new directory with the name
Downloads
A message will appear that the directory Downloads has been created, but will not be synchronised with Nextcloud. - Restore all the data that you saved previously
Updating
Update containers
- Log in to
Nextcloud - Go to the
Administration settings - Log in the
Nextcloud AIO interface - Stop all containers by clicking on
Stop containers - Click on
Update mastercontainer - Create a backup
a. Click onClick here to reveal all backup options
b. Create a backup by clicking onCreate backup - Click on
Start and update containers
Automatic update
- Log in to
Nextcloud - Go to the
Administration settings - Log in the
Nextcloud AIO interface - Click on
Click here to reveal all backup options - Go to the section
Daily backup and automatic updates - Check if the option
Automatically update all containers, the mastercontainer and on saturdays your Nextcloud appsis selected. - Accept the default time, or set your own, and click on
Submit
Future improvements
The above installation could be improved in the following way:
1. Use Podman instead of Docker
When Podman is 100% 'API complaint' with Docker, Podman could be used. The advantage of this would be that you don't need to install Docker anymore. Another advantage is that we can now use nftables instead of iptables (the only reason that we use iptables is that Docker contains a bug that prevents us from working with nftables). And the last advantage is, that we can now use systemd unit files to launch containers instead of Podman-compose. This offers better integration with the system.
2. Use Caddy instead of Apache
Using Caddy instead of Apache has the following advantages:
- Much easier configuration.
- No need to install Certbot (because HTTPS is configured automatically).
- And because Certbot is not needed, the installation of Snap is also not necessary anymore (which doesn't really fit on a RHEL installation).
3. Improve the installation of RHEL
Red Hat could improve the installation of RHEL on the following two points:
- Allow an Ethernet connection to be configured, even when there is no network cable attached to the server at the moment of installation.
- Use the complete hard drive for storage. Or in other words: don't split the hard drive in half with unnecessary partitions that can't be resized (!).
The bigger picture
This blog post is part of a bigger project: besides running Nextcloud on the server, I also wanted to have my own online development environment (OpenVSCode) and for designing a new website, I also wanted to have my own online design tool (Penpot). Everything, of course, running in containers!
Links to the other two blog posts:
The image below shows all the containers and end-user applications that will be running when you have installed Nextcloud, OpenVSCode en Penpot.

Have fun with your server!