On this page
Introduction
This blog post describes how you can install the online UX design application Penpot on your own server. To run Penpot on the server Docker is used.
This blog post is a follow-up post of the blog post Install Nextcloud with Docker and for this reason I assume that you have a working server with Red Hat Enterprise Linux and Docker installed. Besides these, I also assume that you have a working reverse proxy and you have one or more domain names that point to your (home) server (with or without dynamic DNS). If you haven't installed or configured these applications, do so before proceeding. The blog post above describes how you can do that.
While this blog post is about installing Penpot on Red Hat Enterprise Linux, you can also use this tutorial for installing it on AlmaLinux, Rocky Linux or any other RHEL derivatives.
Software setup
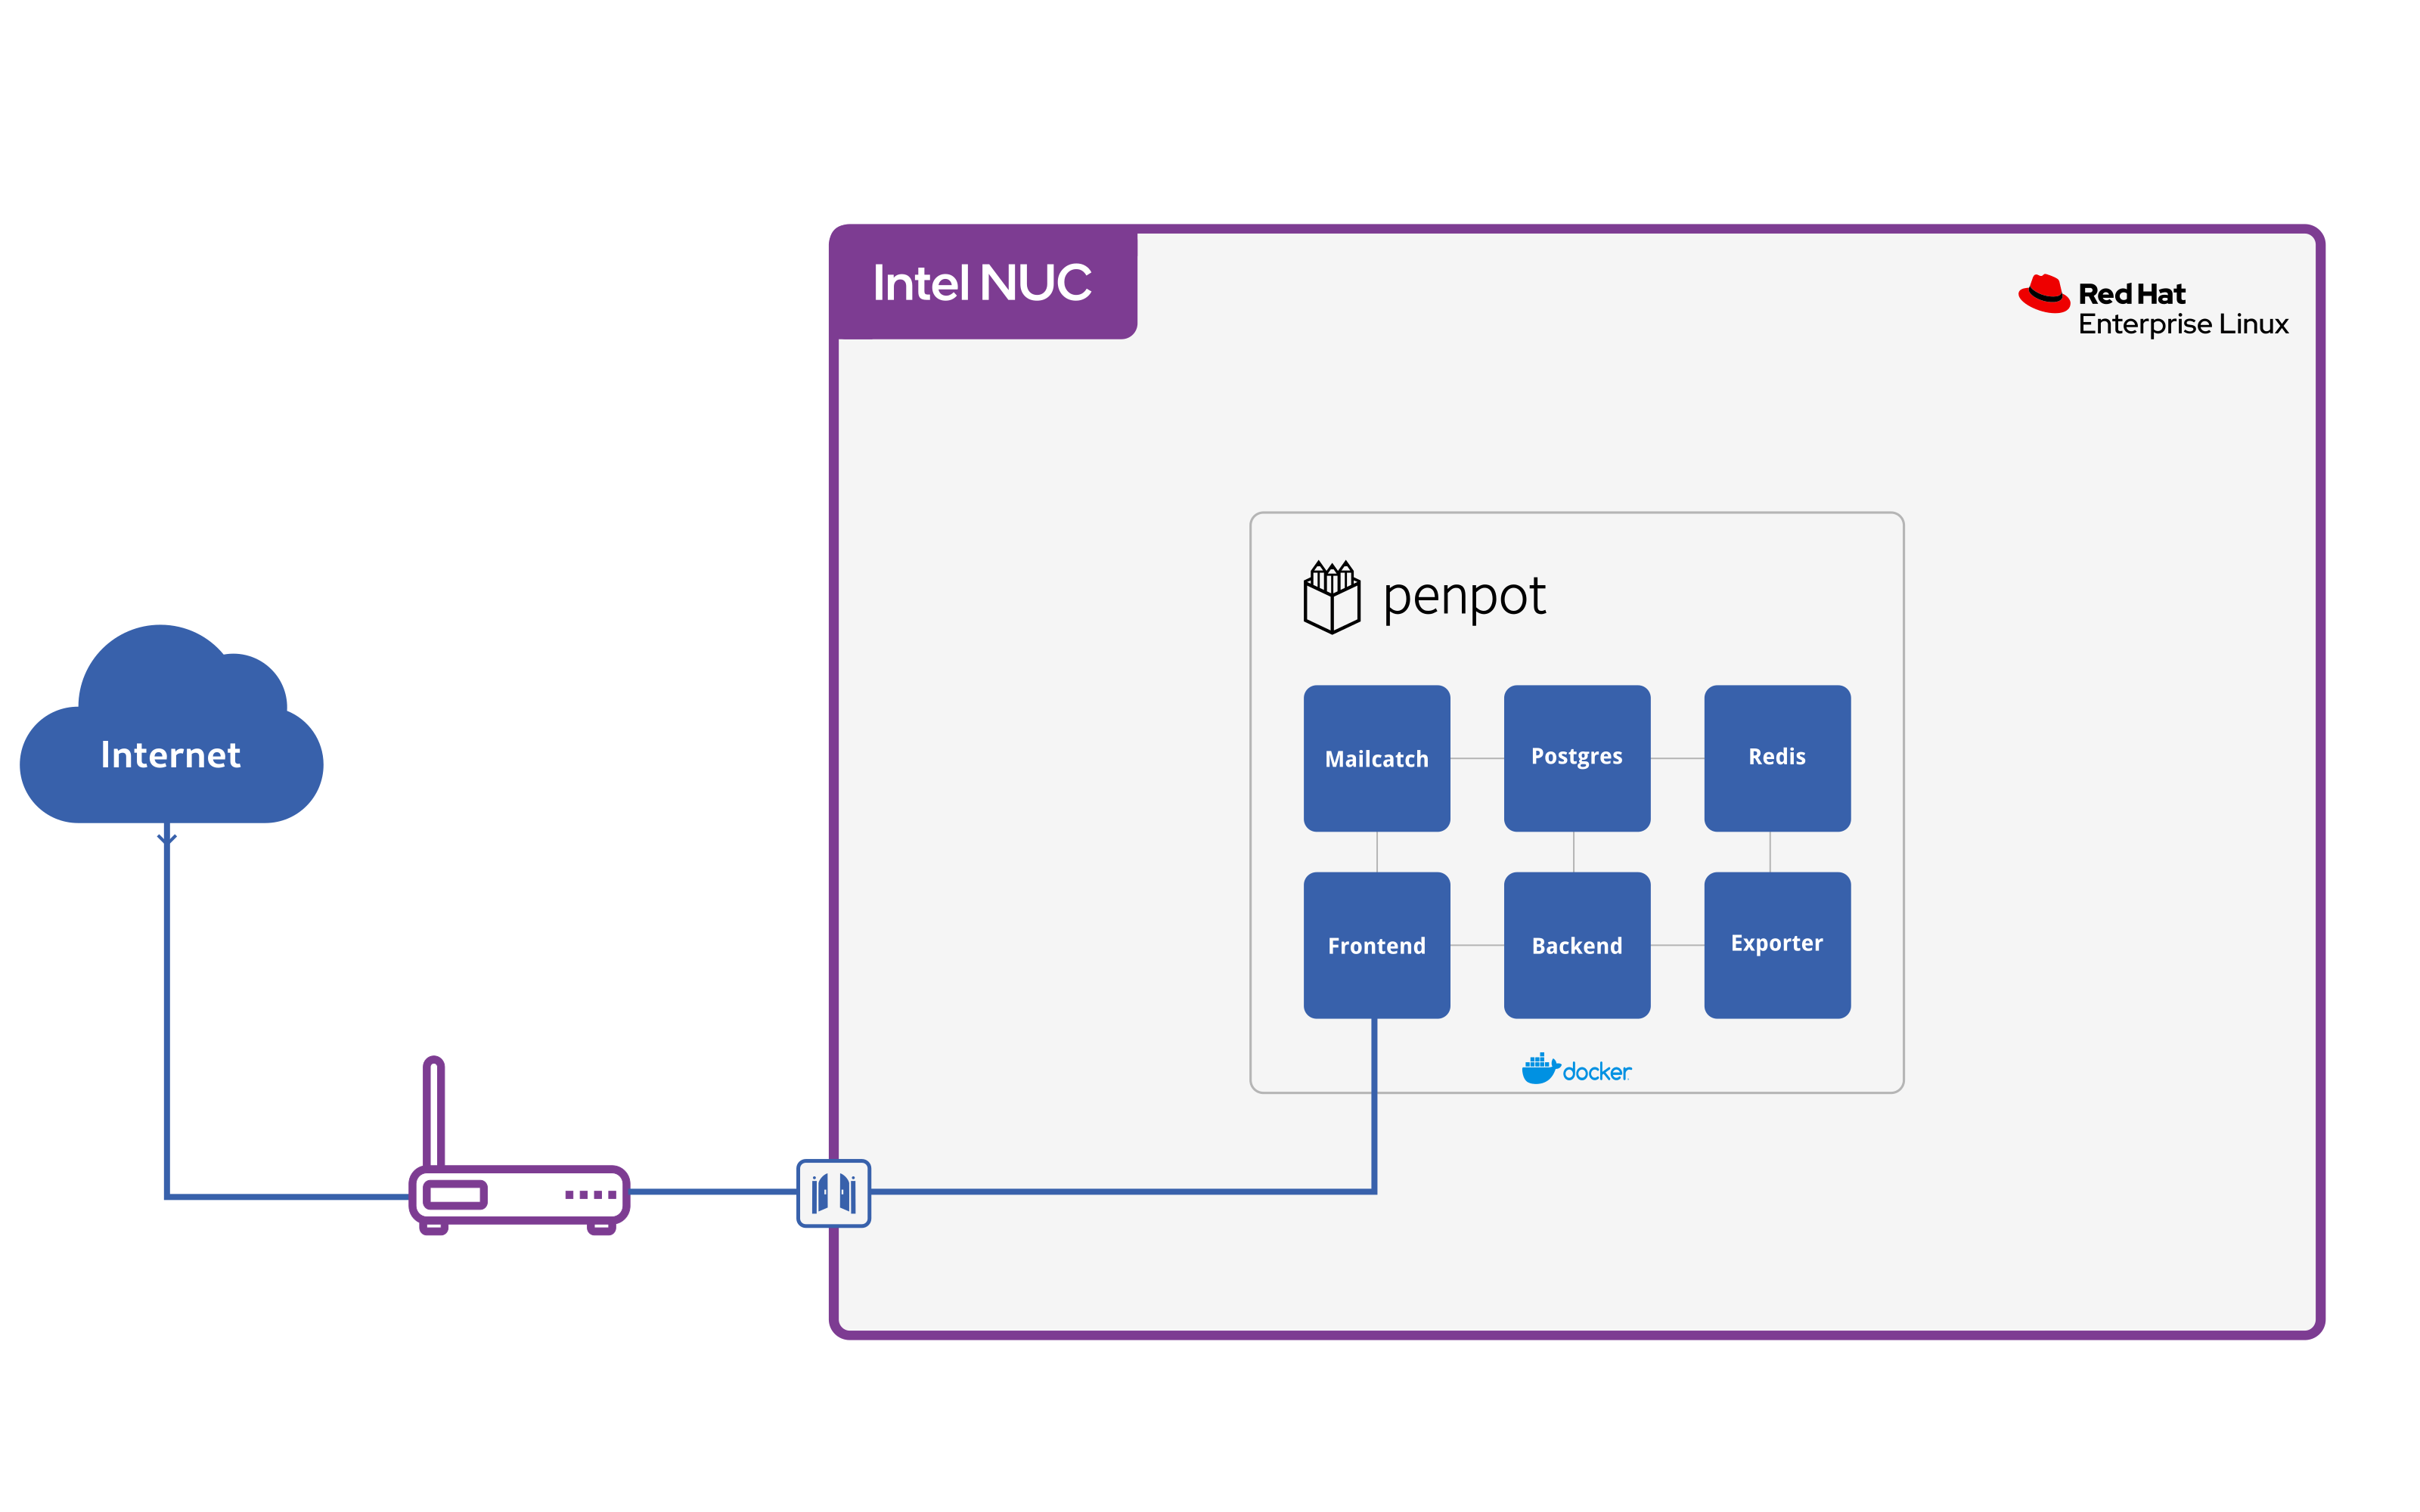
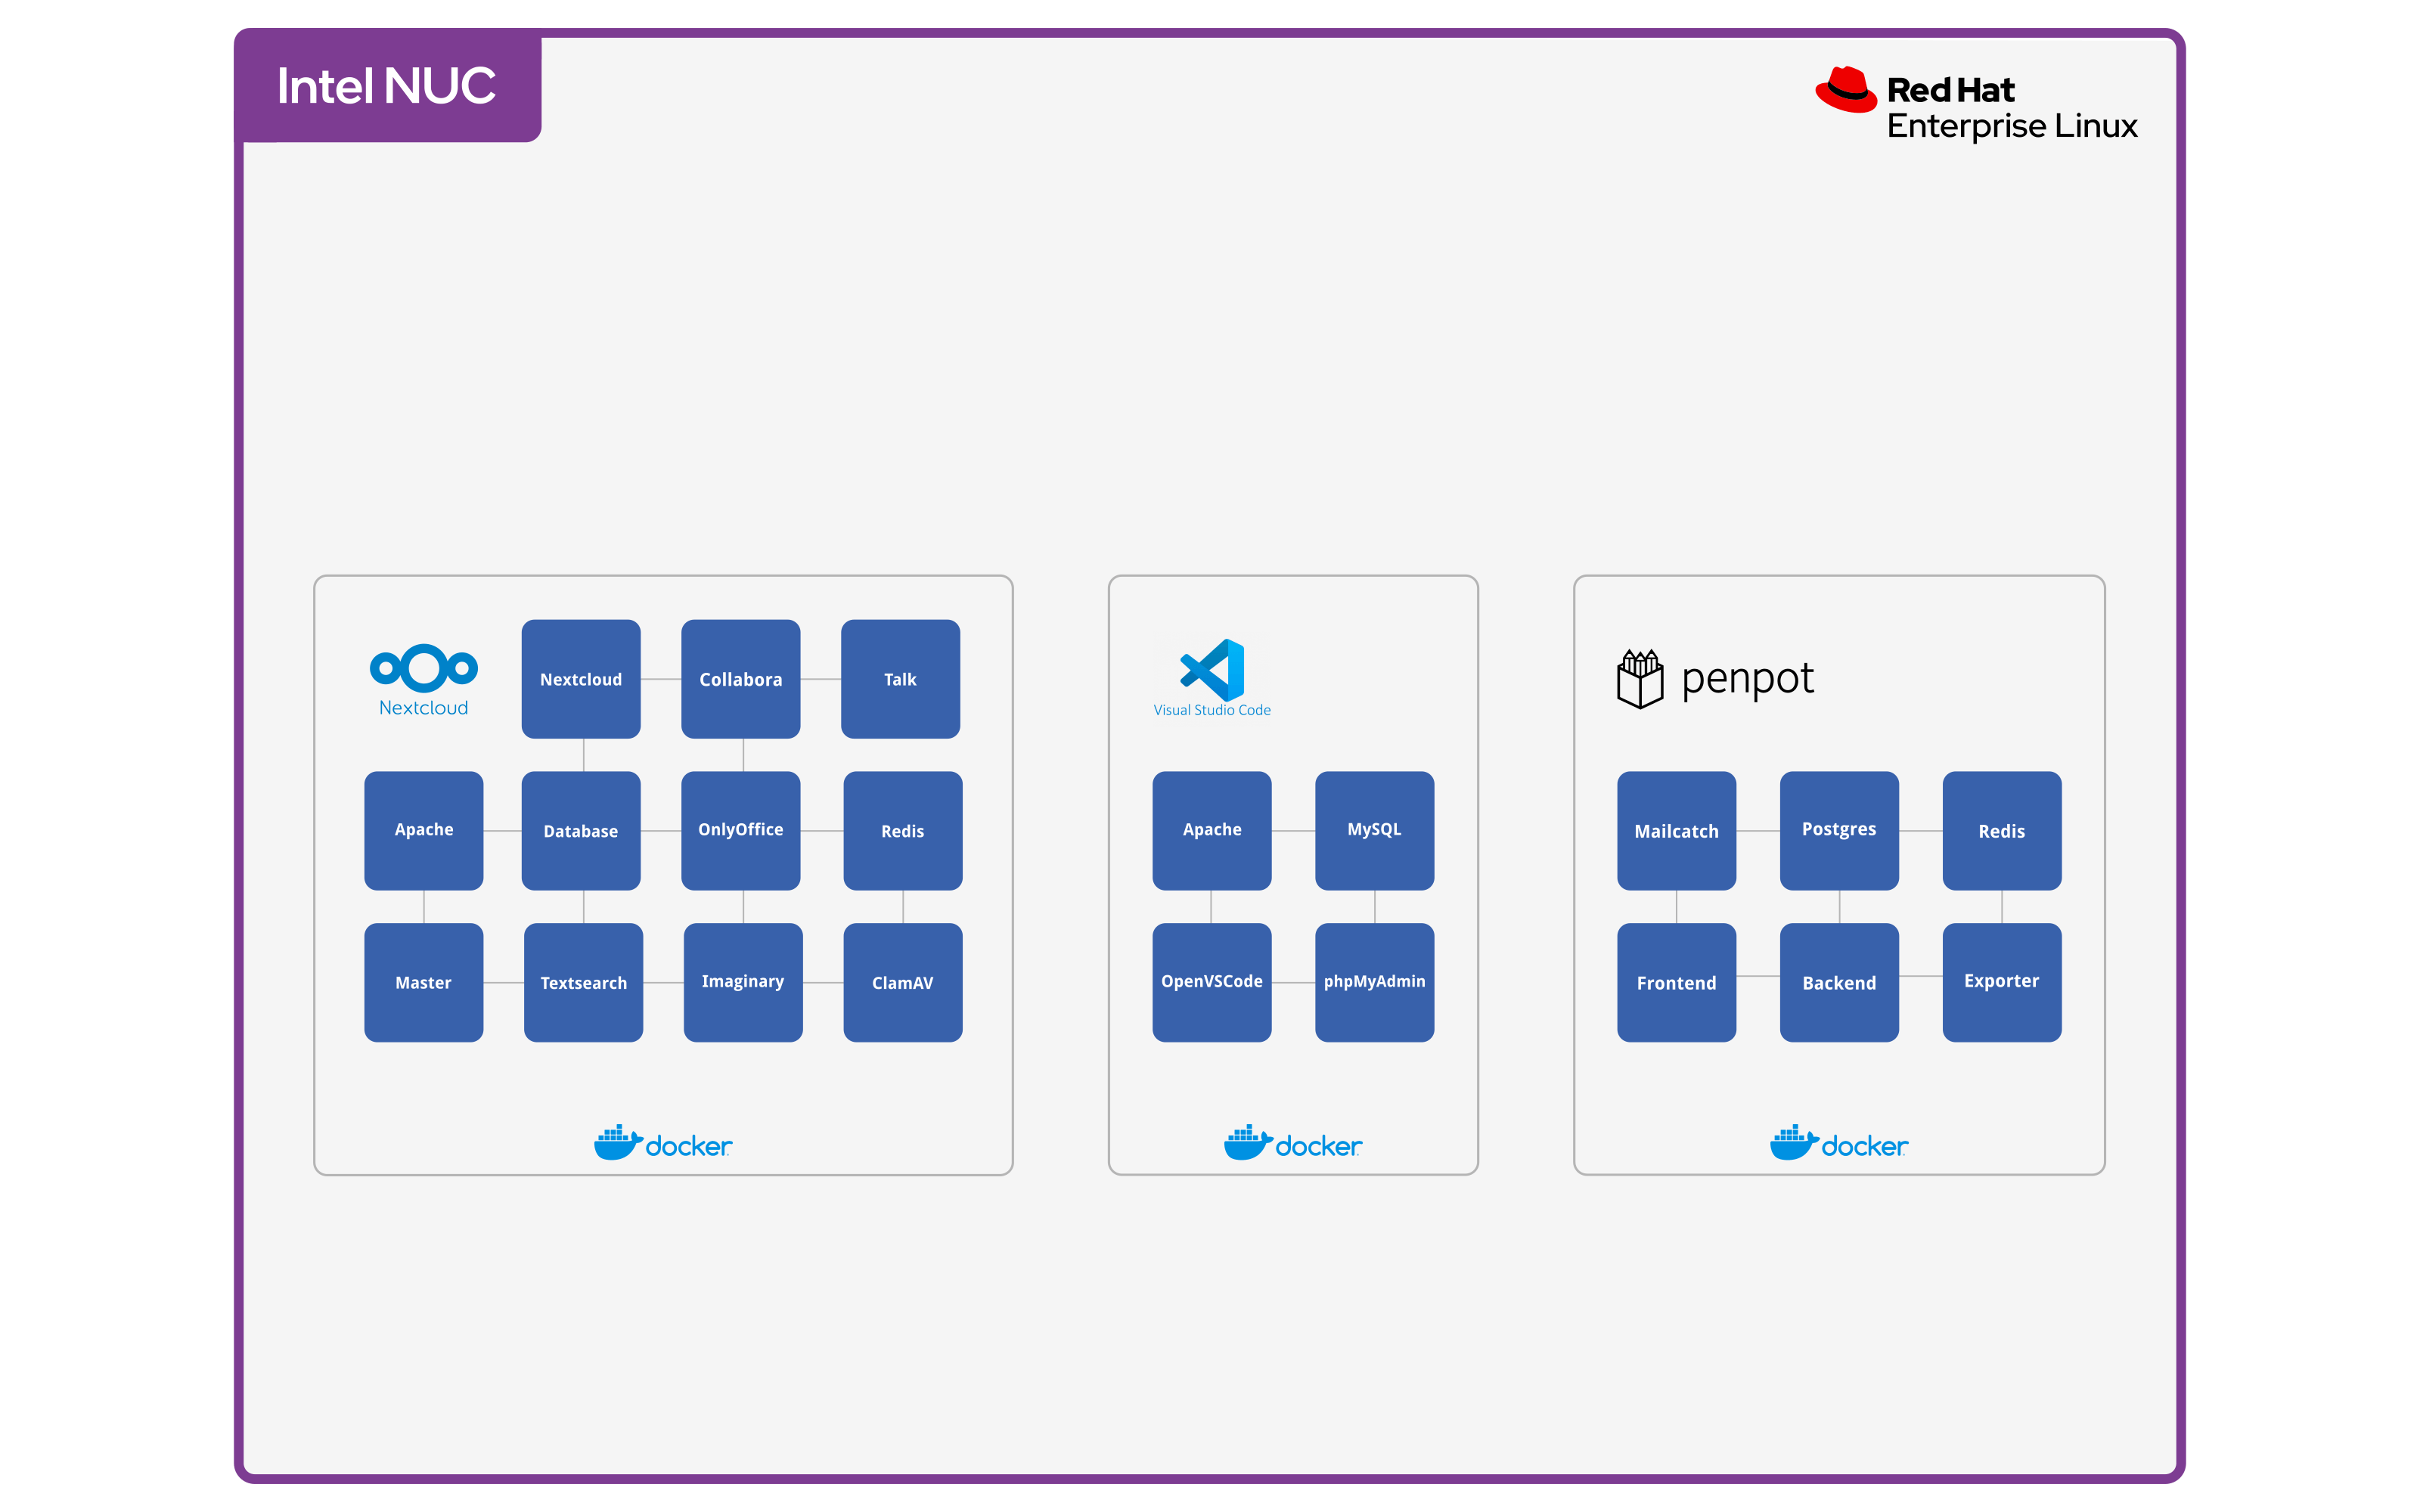
The image above shows all the containers that will be running when you have installed Penpot on the server. What is not shown, is the reverse proxy that redirects all internet traffic to the Frontend container.
Screenshot
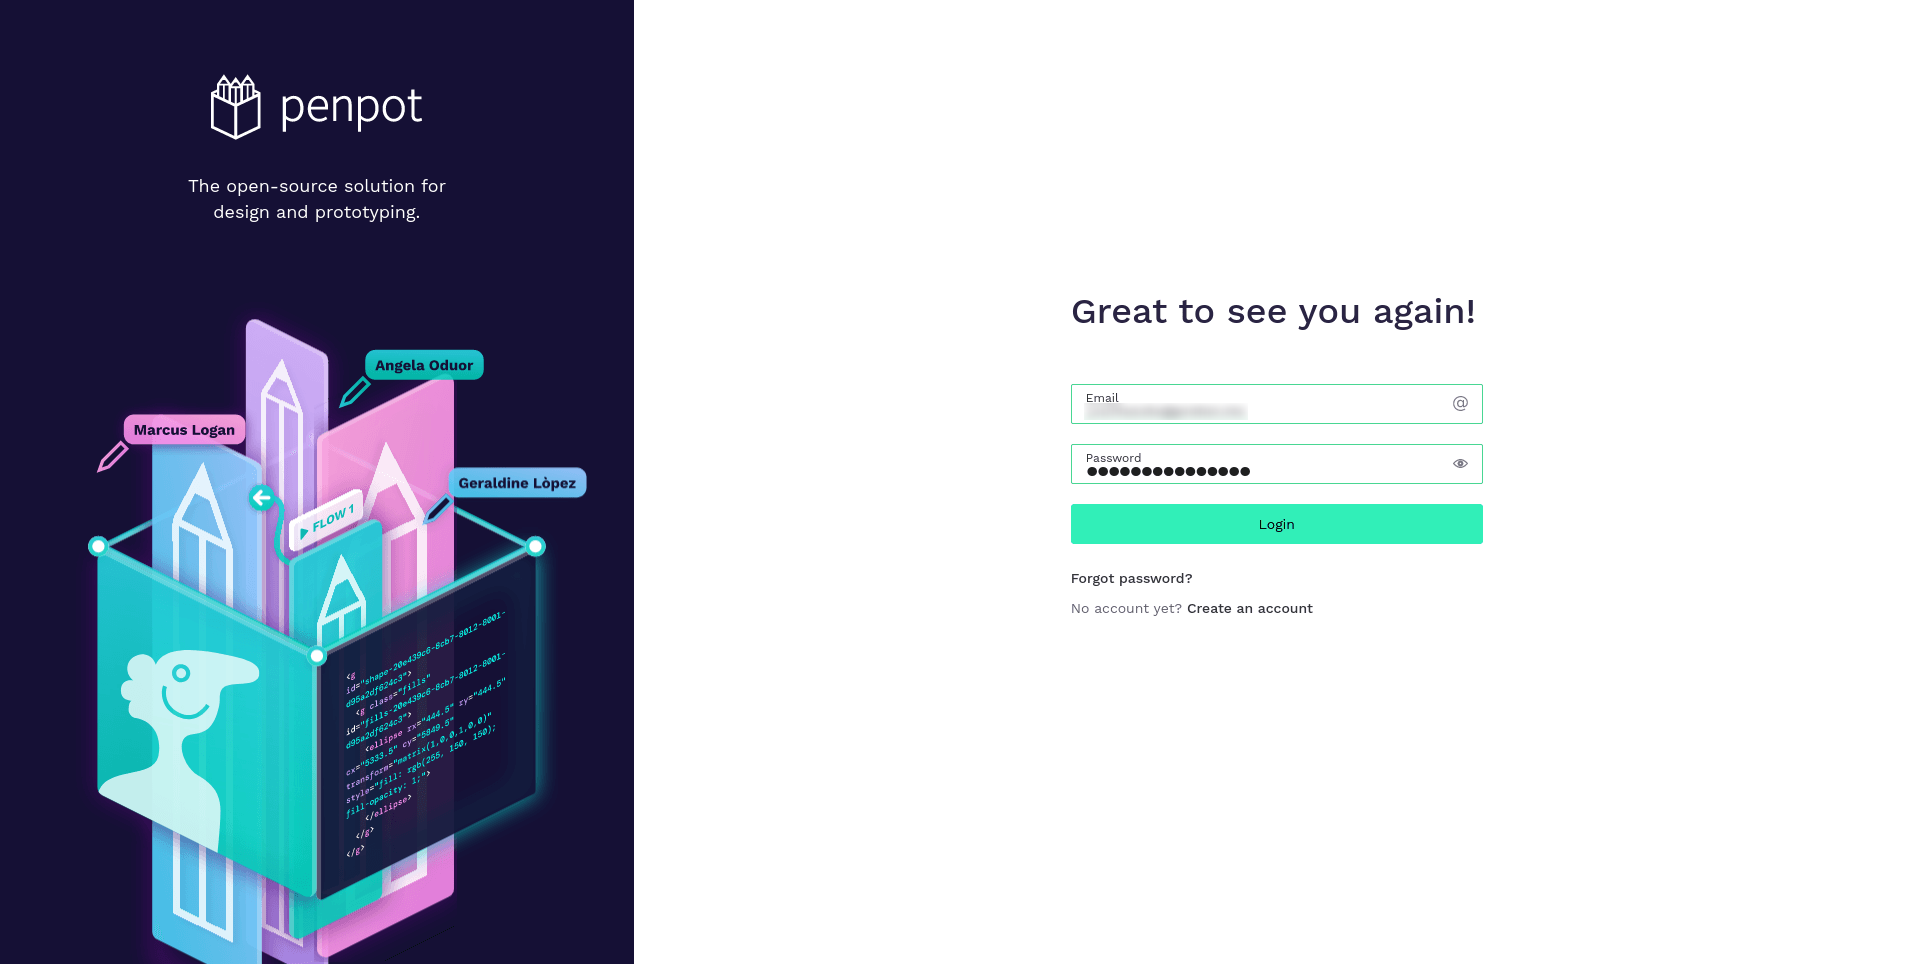
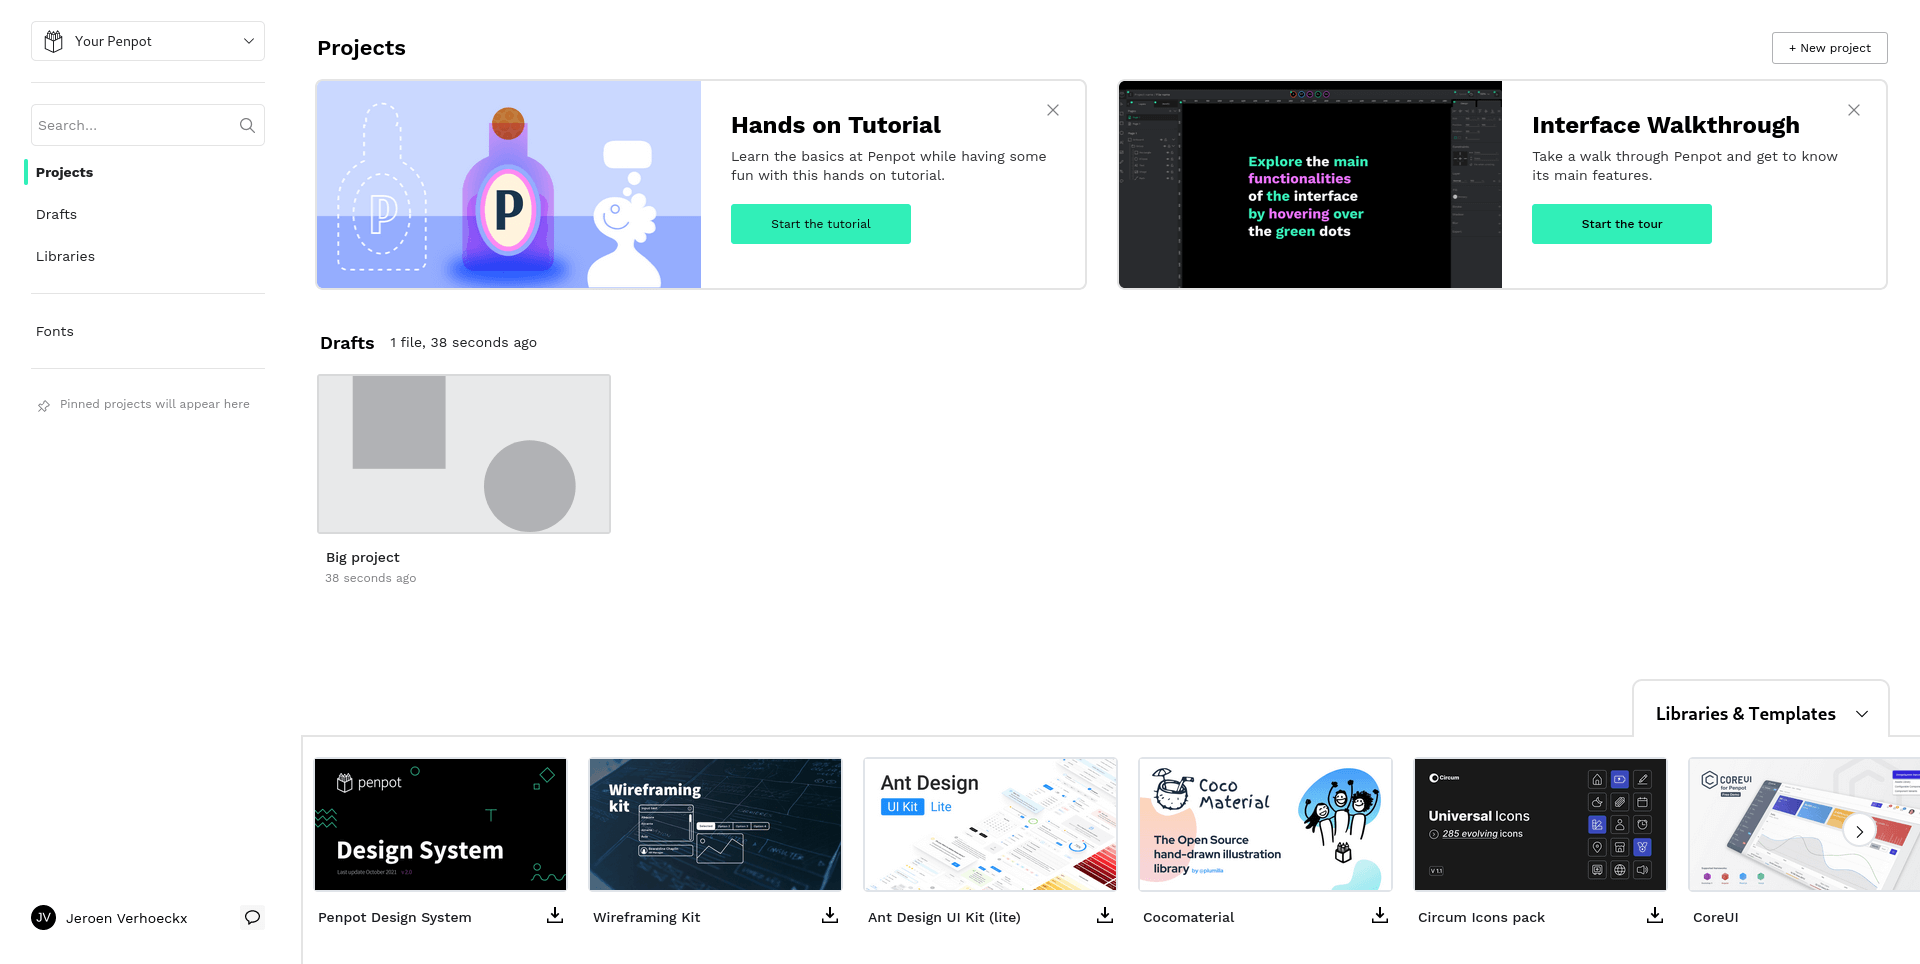
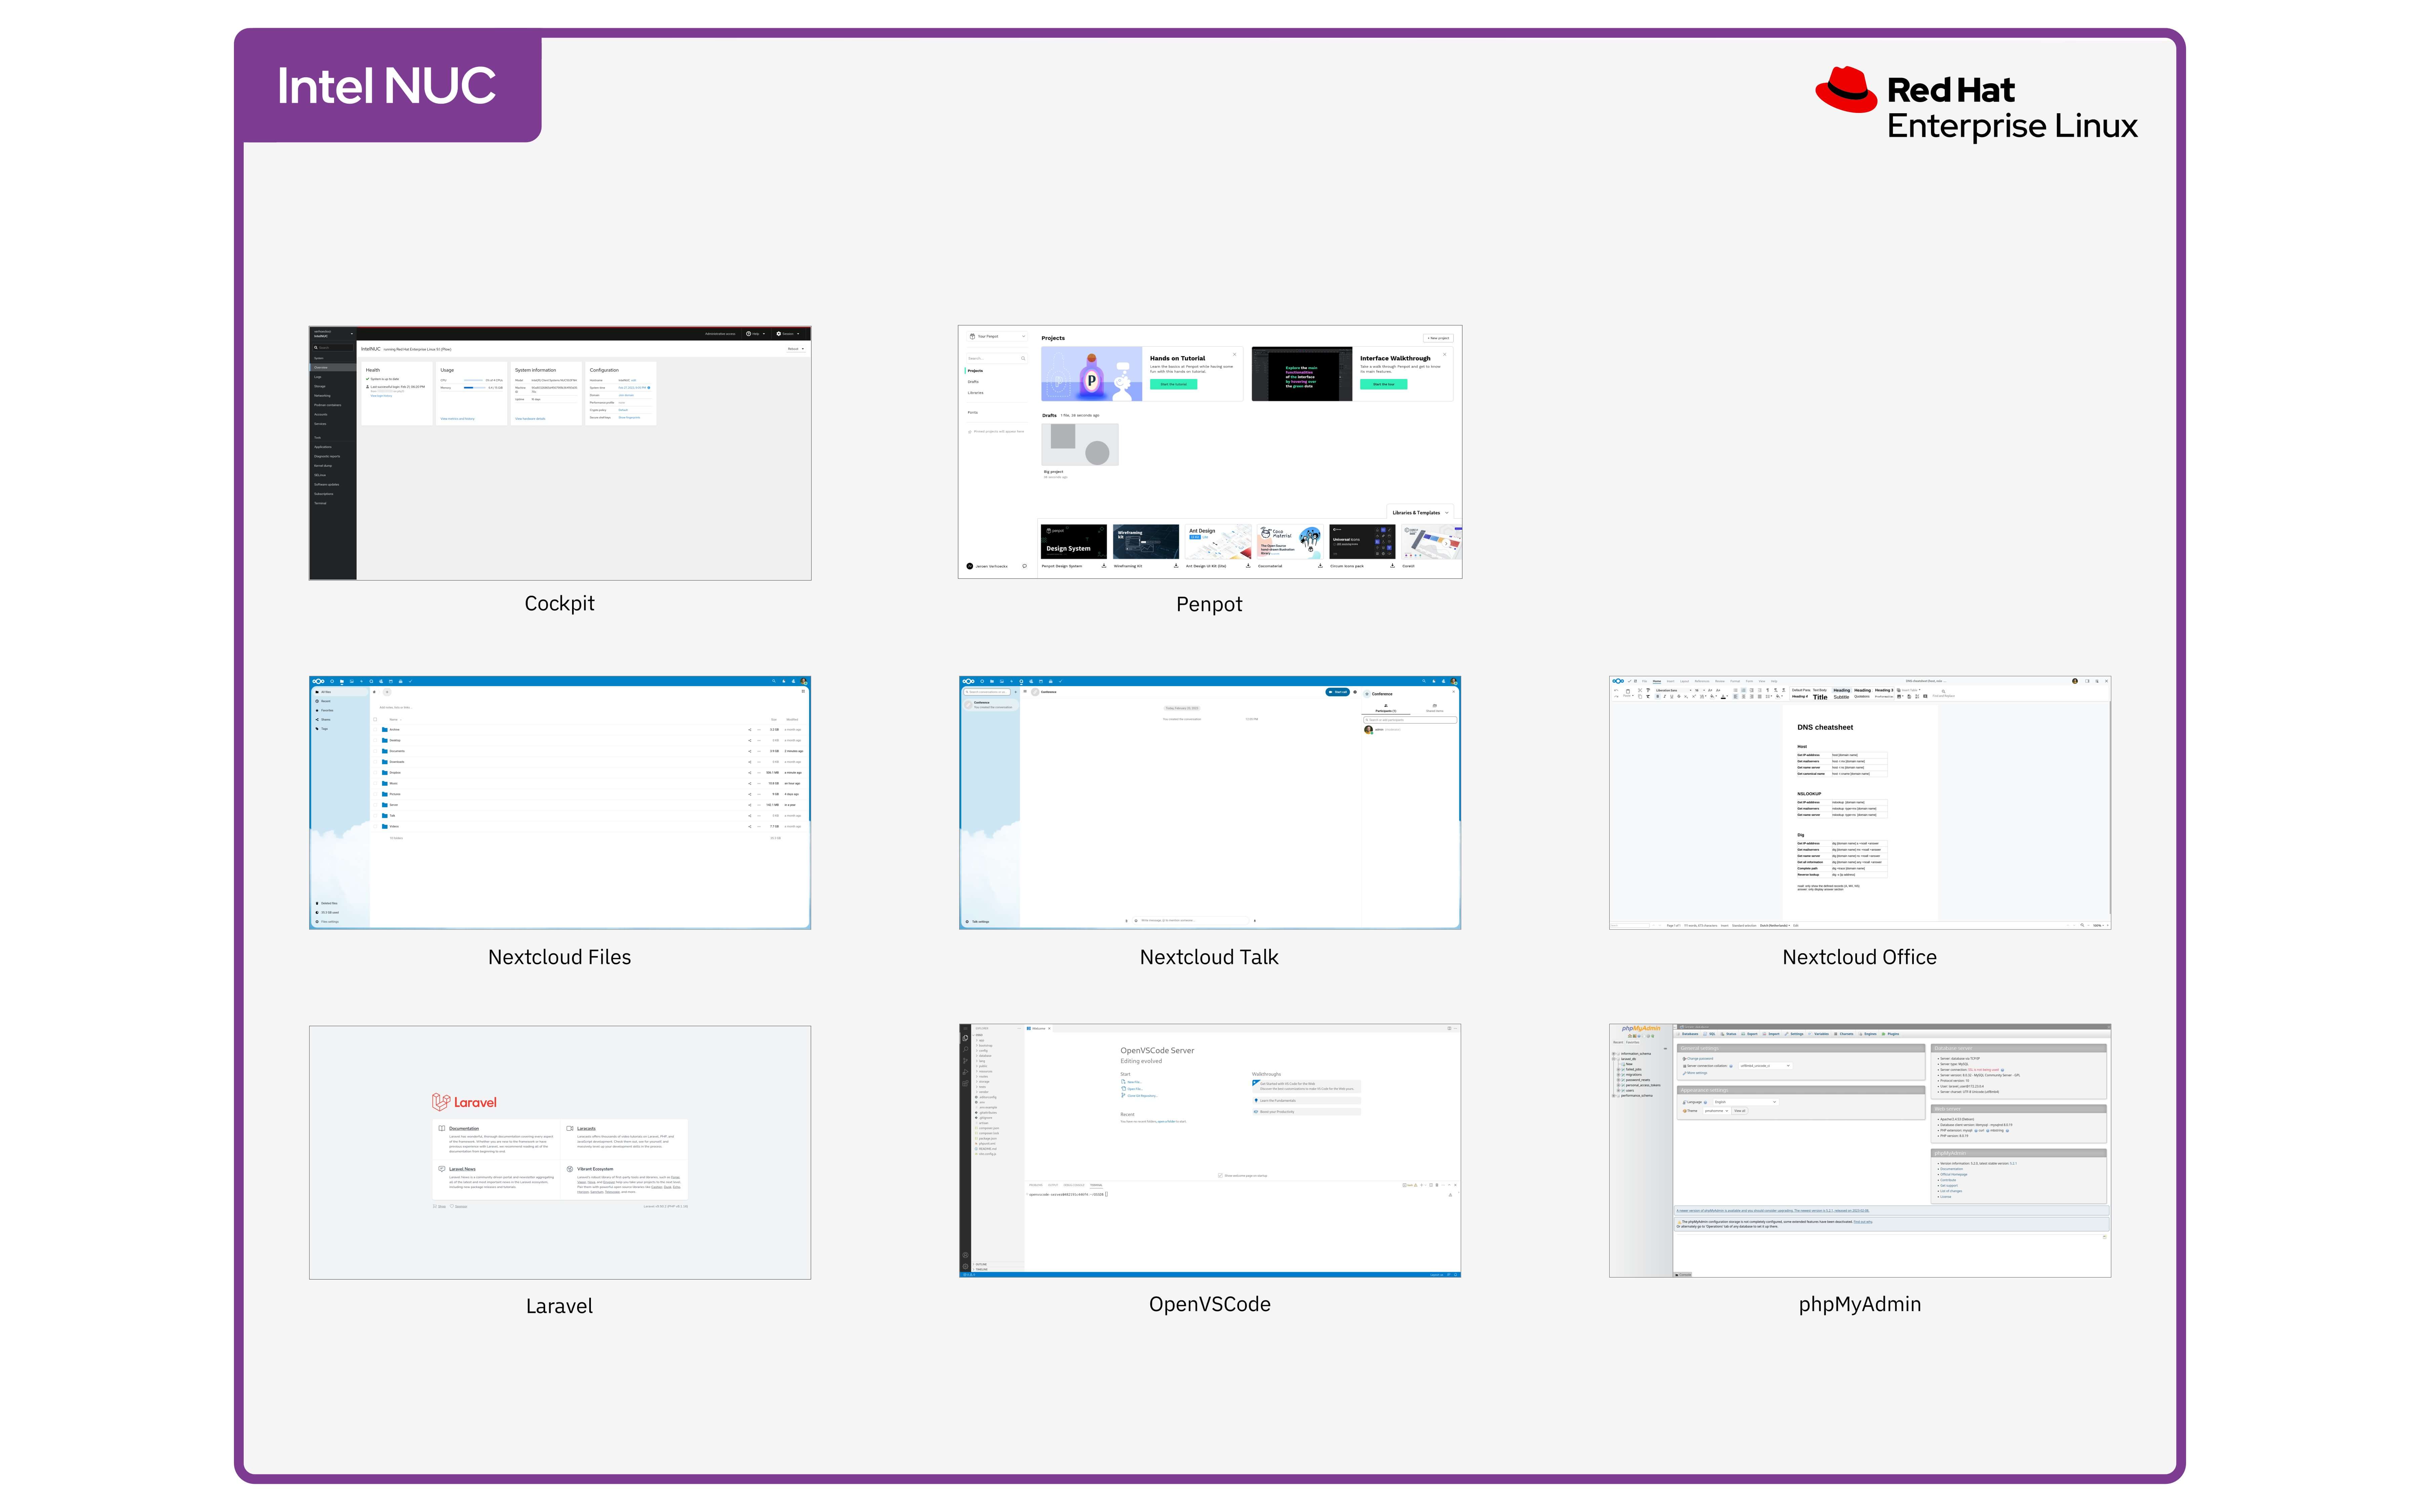
The above screenshots show: the login screen from which you can log in Penpot, the dashboard from which you can start a new project and the workspace for designing an application.
Contact
If you have any questions or just want to give some feedback, you can e-mail me using the contact form of this website.
Setup reverse proxy
Add virtual hosts
1. Open the reverse proxy configuration file.
sudo vim /etc/httpd/conf.d/reverseproxy.conf2. Add the following code.
<VirtualHost *:80>
    ServerName [new or third domain name]
</VirtualHost>

<VirtualHost *:443>
    ServerName [new or third domain name]
</VirtualHost>
3. Restart Apache
sudo systemctl restart httpdGenerate SSL certificate
1. Install Certbot
How you can install Certbot can be found here.
2. Request the certificate from Let's Encrypt
sudo certbot --apacheSelect the new (sub) domain name for which you want to request the SSL certificate.
When you now open the file reverseproxy.conf, you will see that the SSL certificate has been added!
<VirtualHost *:80>
    ServerName [new or third domain name]
    RewriteEngine on
    RewriteCond %{SERVER_NAME} =[new or third domain name]
    RewriteRule ^ https://%{SERVER_NAME}%{REQUEST_URI} [END,NE,R=permanent]
</VirtualHost>

<VirtualHost *:443>
    ServerName [new or third domain name]
    SSLCertificateFile /etc/letsencrypt/live/[new or third domain name]/fullchain.pem
    SSLCertificateKeyFile /etc/letsencrypt/live/[new or third domain name]/privkey.pem
    Include /etc/letsencrypt/options-ssl-apache.conf
</VirtualHost>
Add the reverse proxy
1. Add the line below to virtual host with port 443
ProxyPass / http://localhost:9001/
ProxyPassReverse / http://localhost:9001/
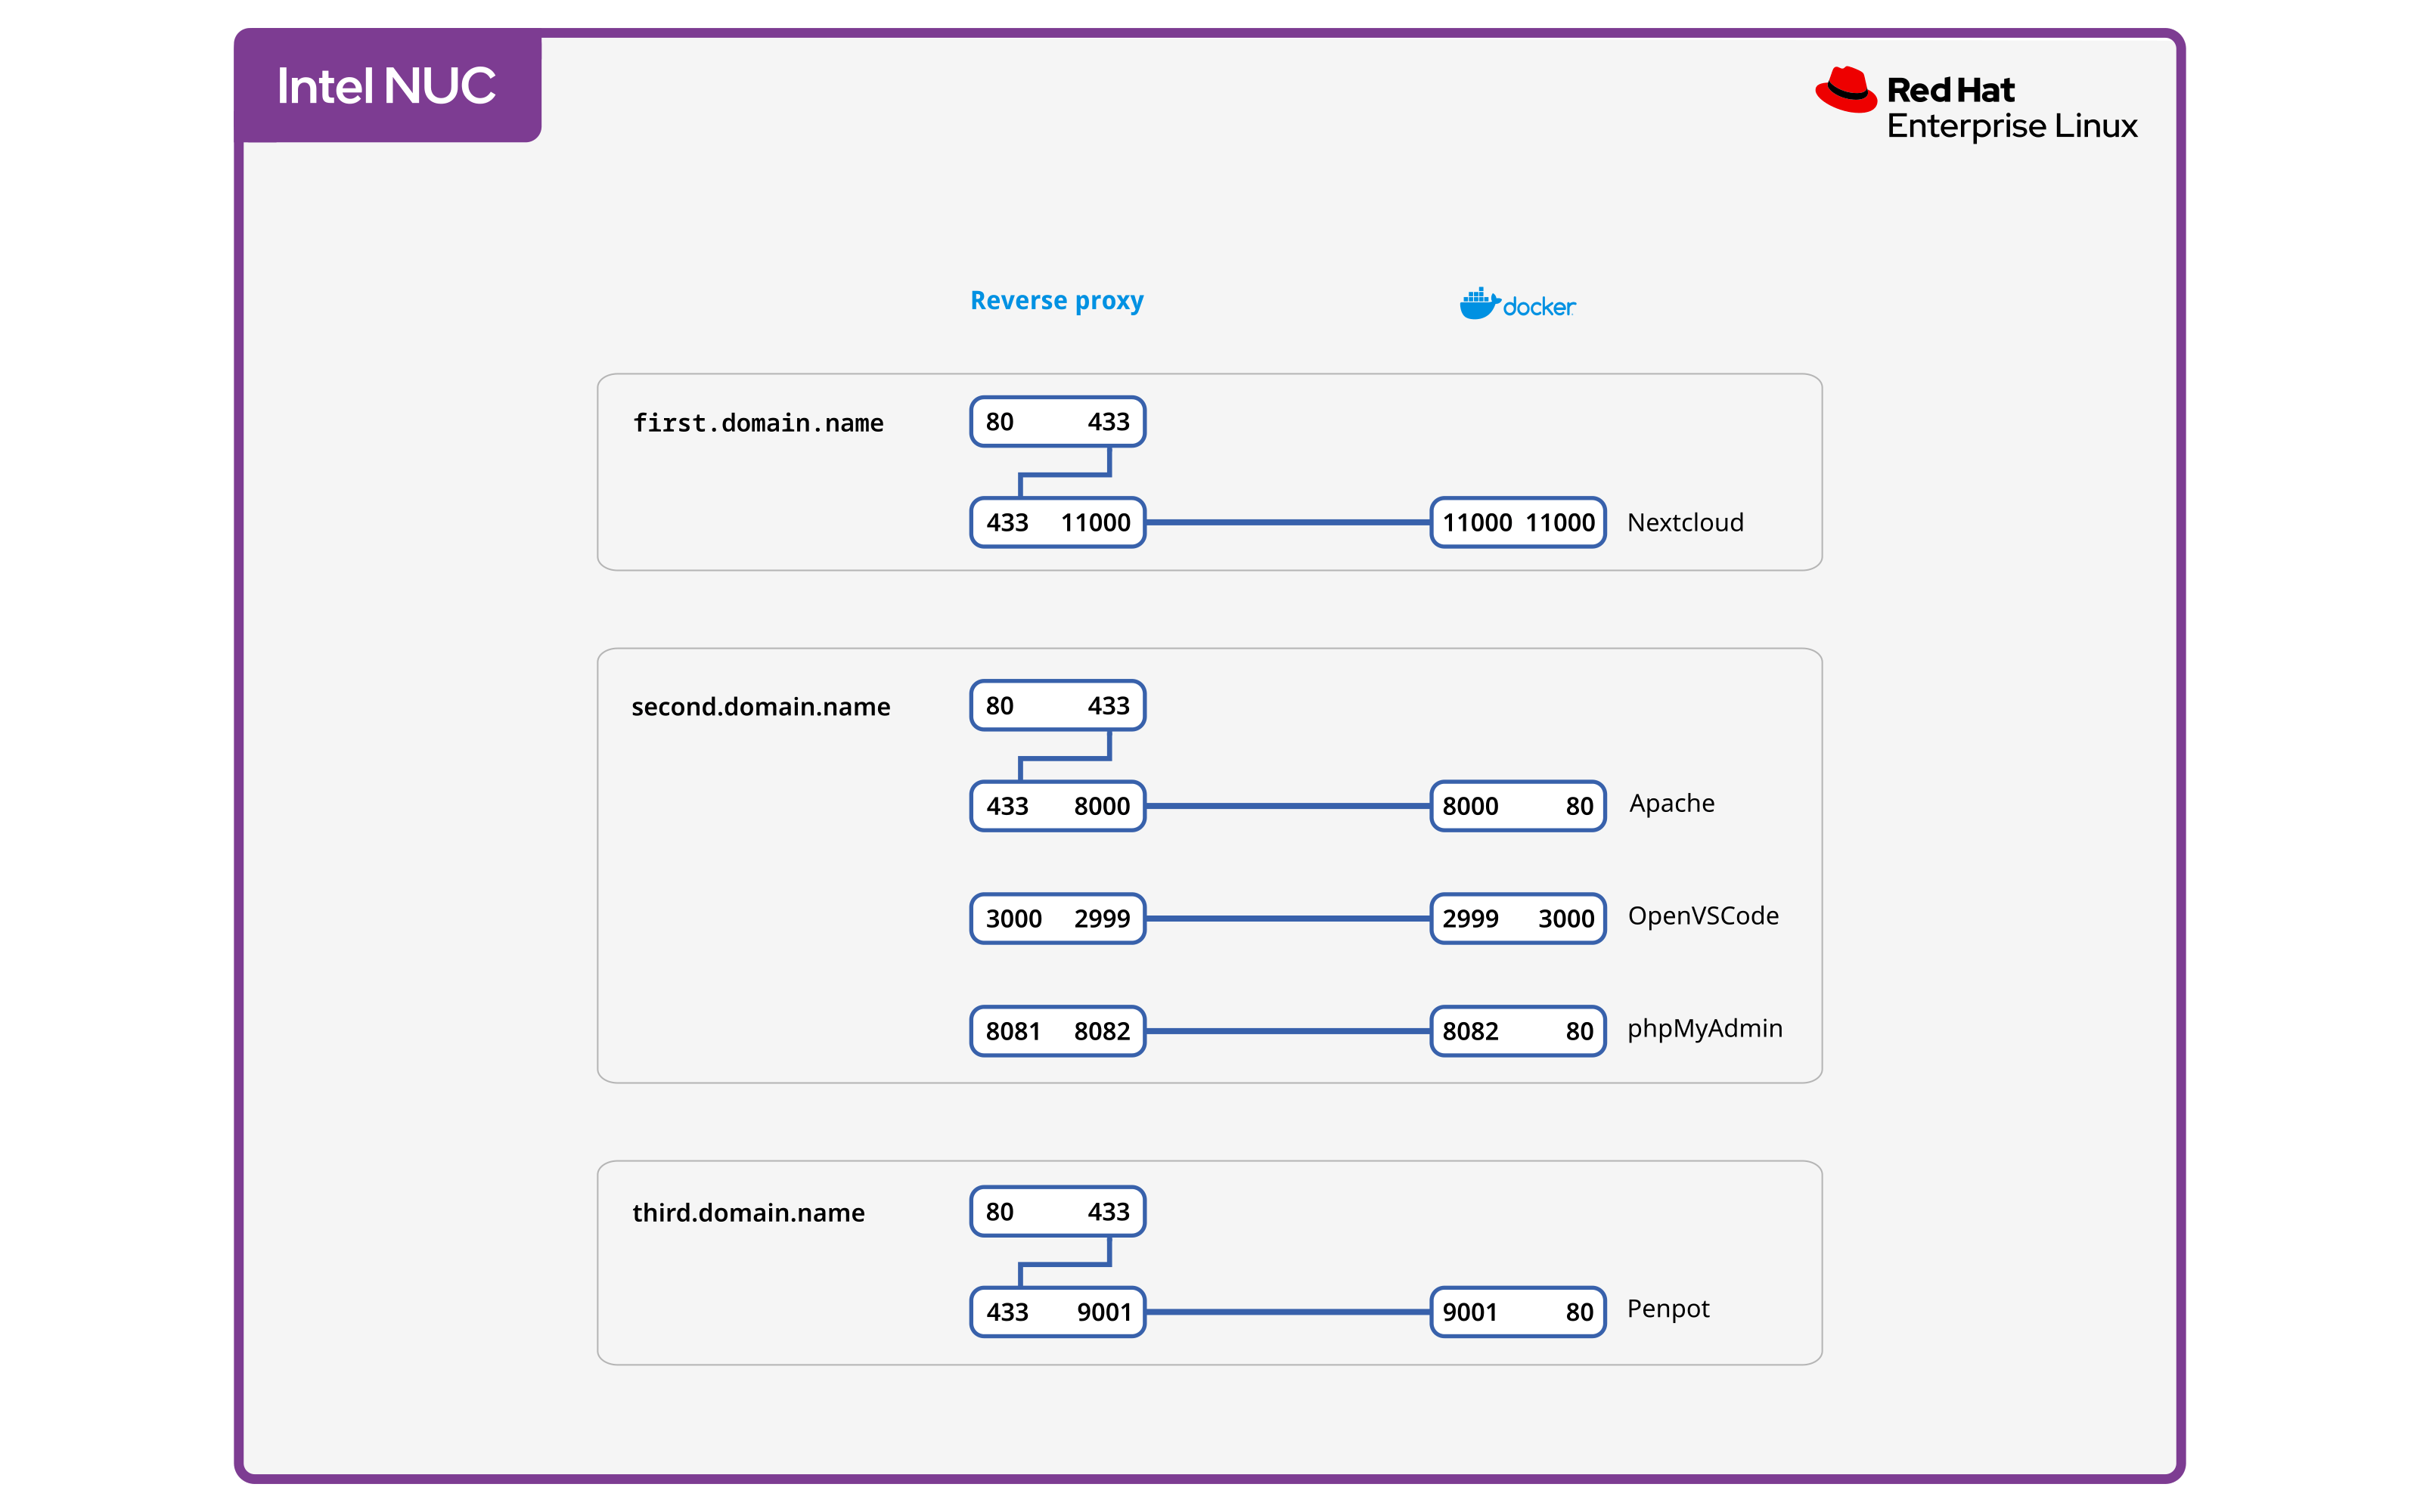
All traffic will now be forwarded from port 433 to port 9001
2. To proxy websockets, also add the code below.
    RewriteEngine On
    RewriteCond %{HTTP:Connection} Upgrade [NC]
    RewriteCond %{HTTP:Upgrade} websocket [NC]
    RewriteRule /(.*) ws://localhost:9001/$1 [P,L]
Your virtual hosts will now look something like the code below.
<VirtualHost *:80>
    ServerName [new or third domain name]
    RewriteEngine on
    RewriteCond %{SERVER_NAME} =[new or third domain name]
    RewriteRule ^ https://%{SERVER_NAME}%{REQUEST_URI} [END,NE,R=permanent]
</VirtualHost>

<VirtualHost *:443>
    ServerName [new or third domain name]

    RewriteEngine On
    RewriteCond %{HTTP:Connection} Upgrade [NC]
    RewriteCond %{HTTP:Upgrade} websocket [NC]
    RewriteRule /(.*) ws://localhost:9001/$1 [P,L]

    ProxyPass / http://localhost:9001/ nocanon
    ProxyPassReverse / http://localhost:9001/

    SSLCertificateFile /etc/letsencrypt/live/[new or third domain name]/fullchain.pem
    SSLCertificateKeyFile /etc/letsencrypt/live/[new or third domain name]/privkey.pem
    Include /etc/letsencrypt/options-ssl-apache.conf
</VirtualHost>
2. Restart Apache
sudo systemctl restart httpdPenpot
Run Penpot
1. Make a project directory in your home directory.
mkdir ~/penpot2. Enter the project directory
cd ~/penpot3. Download the docker-compose file.
wget https://raw.githubusercontent.com/penpot/penpot/main/docker/images/docker-compose.yaml4. Run Penpot
sudo docker compose up -d5. You can now find Penpot at the address below.
https://[new or third domain name]Update Penpot
1. Stop and remove the containers.
sudo docker compose down
2. Get the latest images of the services in the Penpot docker-compose file.
sudo docker compose pull
3. Create and start the containers based on those new images.
sudo docker compose up -dBackup and restore
Backup volumes
1. List all the volumes on your system.
sudo docker volume ls2. Run the command below to backup the volume that you want.
sudo docker run --rm --volume [name volume]:/volume_data -v $(pwd):/backup ubuntu tar cvf /backup/[name volume].tar /volume_dataReplace [name volume] (twice) with the name of the volume that you want to backup.
3. Move the backup files to an external drive or an USB stick.
Restore volumes
1. Move the backup files from an external drive or an USB stick to your server.
2. Run the command below to restore a volume.
sudo docker run --rm -v [name volume]:/volume_data --volume $(pwd):/backup ubuntu tar xvf /backup/[name volume].tar -C /volume_data --strip 1
Replace [name volume] (twice) with the name of the volume that you want to restore.
The bigger picture
This blog post is part of a bigger project to have my own cloud platform (Nextcloud), online development environment (OpenVSCode) and my own online design tool (this post). The two other projects are also documented and you can find the links to these blog posts below.
Links to the other two blog posts:
The image below shows all the containers and end-user applications that will be running when you have installed Nextcloud, OpenVSCode en Penpot.
Have fun with your server!